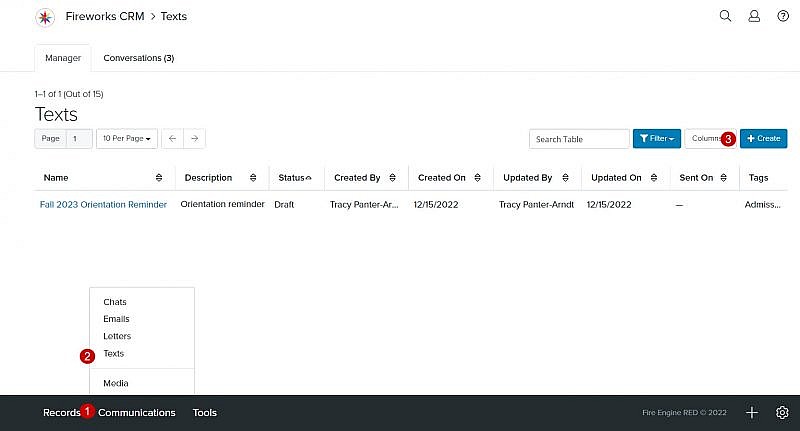
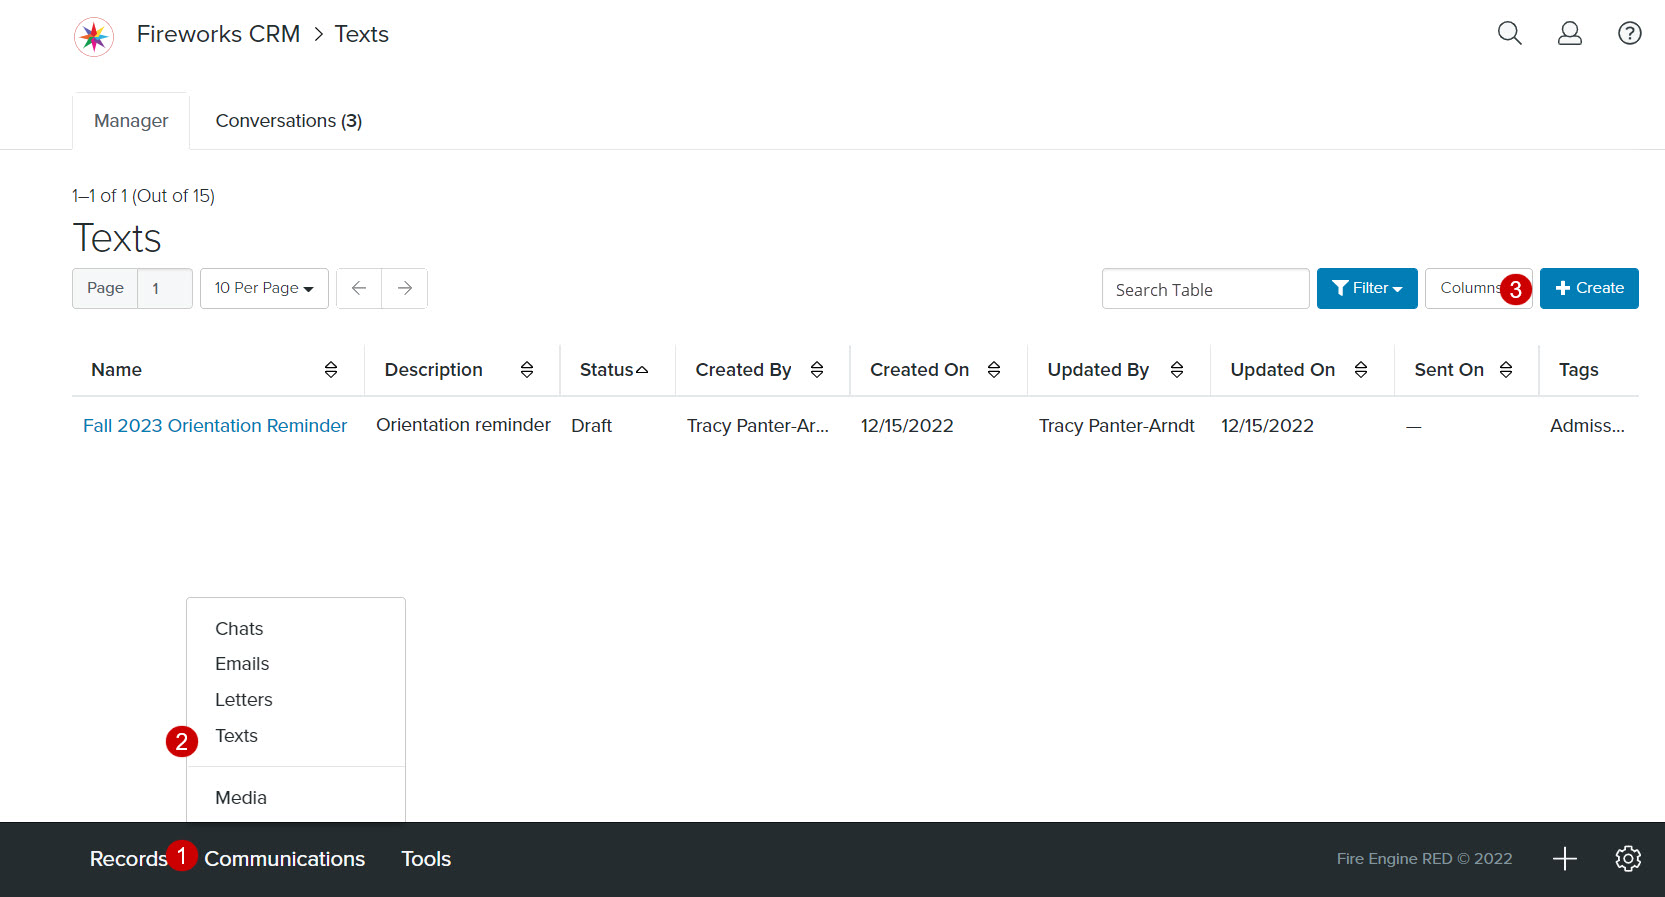
Navigation: Communications > Texts
Phone Number Conditions
To receive a text, the intended recipient’s record must include:
- A valid mobile phone number
- A phone type of mobile
- A phone status of Active
- The method used to opt-in
- An opt-in status of subscribed – confirmed
- The date the recipient opted-in
Accessing the Text Composer
- From the bottom navigation bar, click Communications
- Click Texts. The Text Manager will display.
- Click +Create. The Text Composer will display.
Using the Text Composer
The Text Composer has four sections that you’ll need to complete.
Tip: As you complete a section, you’ll automatically be moved to the next section.
- Start
- Body
- Actions
- Finish
Tip: Be sure to save your information frequently.
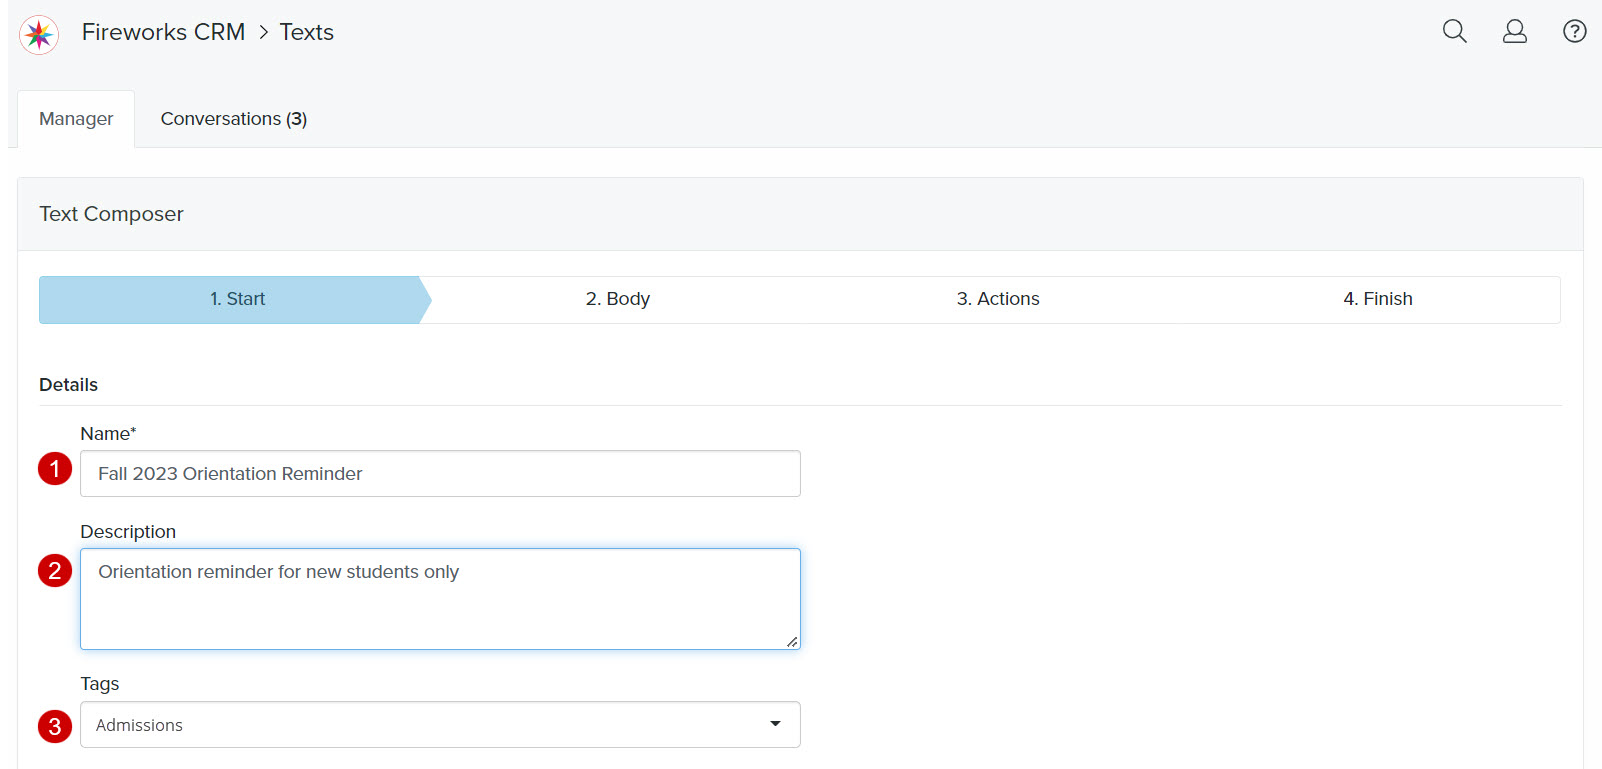
Start
Details
- Name: Enter the name of the text
- Description: Describe your text so that other staff members will be able to easily identify it
- Tags: Select a Tag from the Tags dropdown menu

Recipients
You have two options:
- Sending to a Group
-
- Click
 to the right of the Choose an existing Smart Search field. The Smart Search Picker will display.
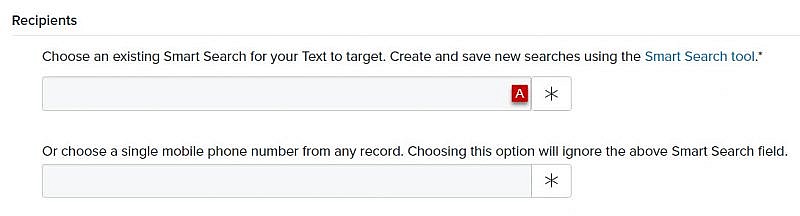
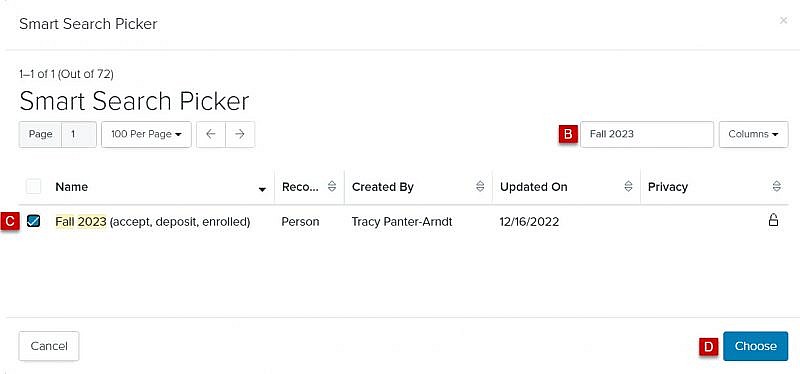
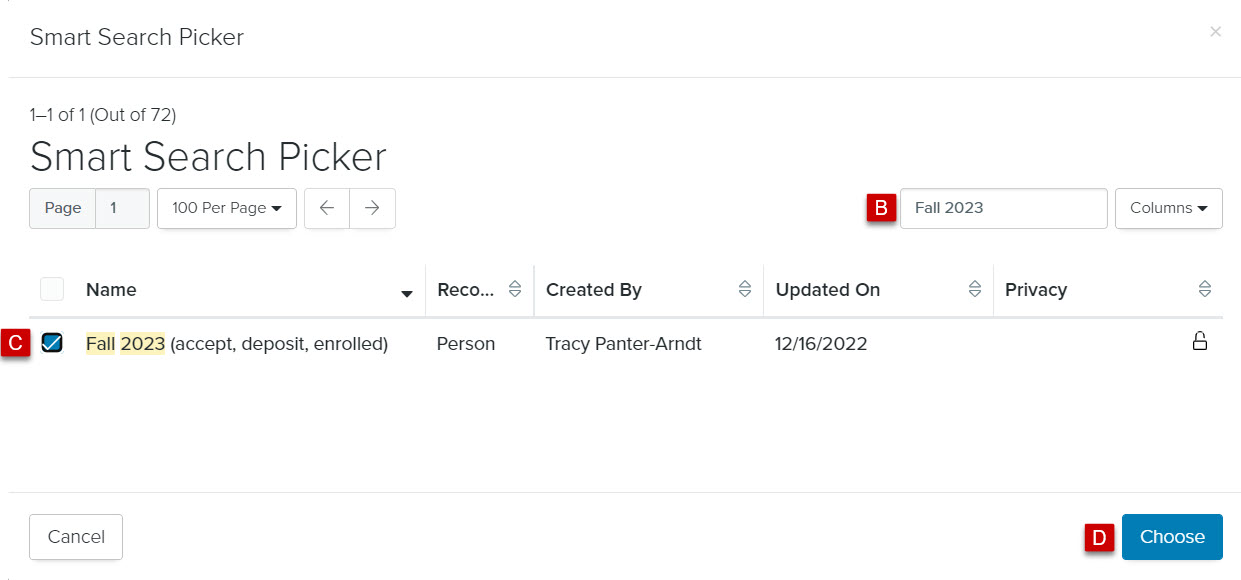
- In the Search field, enter the name of the Smart Search you want to use or scroll through the list of Smart Searches on the page
- Check the box to the left of the Smart Search
- Click Choose. The name of the Smart Search will populate in the Choose an existing Smart Search field
- Click Save Changes or Save & Continue
Tip: Before sending a text to a group, we strongly recommend that you send a test message.
- Click
- Sending to an Individual(s)
-
- Click to the right of the Choose a Single Mobile Phone Number field. The Phone Number Picker will display.

- In the Search field, enter the name of the intended text recipient or scroll through the list of names on the page
- Check the box to the left of the intended text recipient’s name
- Click Choose. The phone number will populate in the Choose a Single Mobile Phone Number field.

- Click Save Changes or Save & Continue

Tip: Make sure you remove the Smart Search when changing Recipients from an existing Smart Search to a single mobile phone number. If you fail to remove the Smart Search, the text will be sent to the existing Smart Search rather than the single phone number.
Tip: To remove a Smart Search, click, uncheck the Smart Search, click Choose, and Save Changes.
Tip: To remove a single phone number click, uncheck the single phone number, click Choose, and Save Changes.
- Click


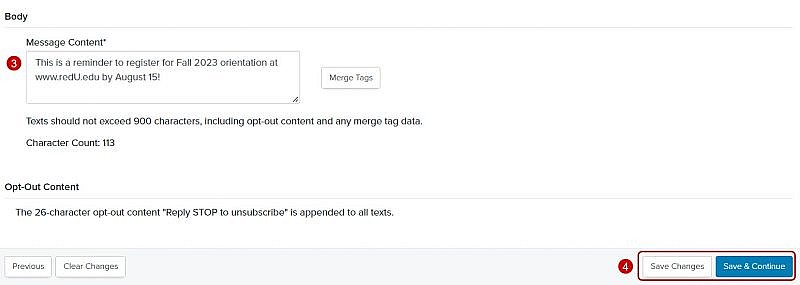
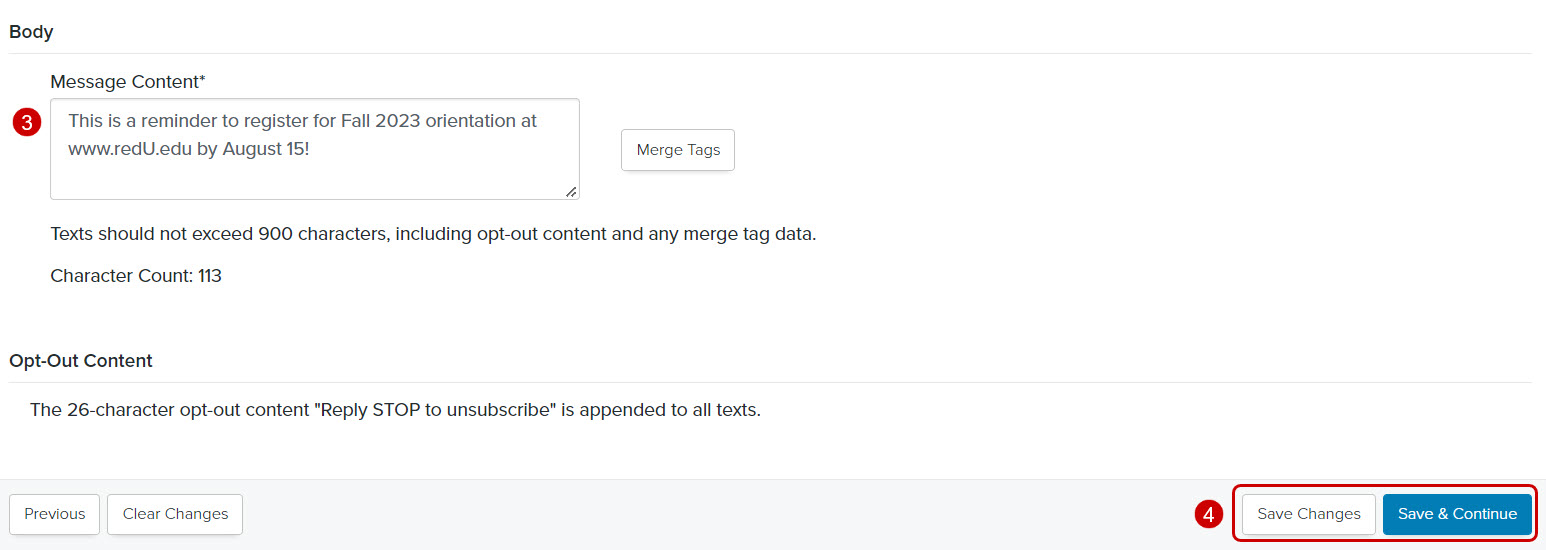
Body
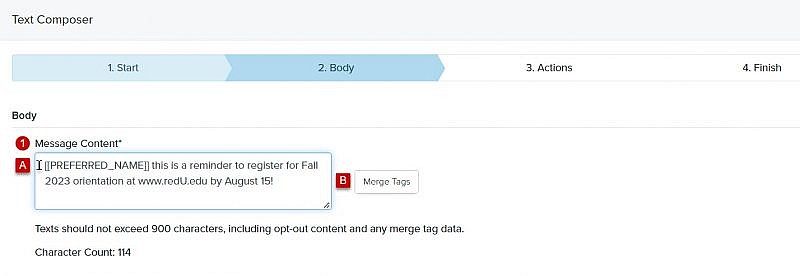
- Message Content: Enter the text message content
Tip: The length of your text should not exceed 900 characters, including spaces and the required 26 character Opt-out Content (i.e. Reply STOP to Unsubscribe).
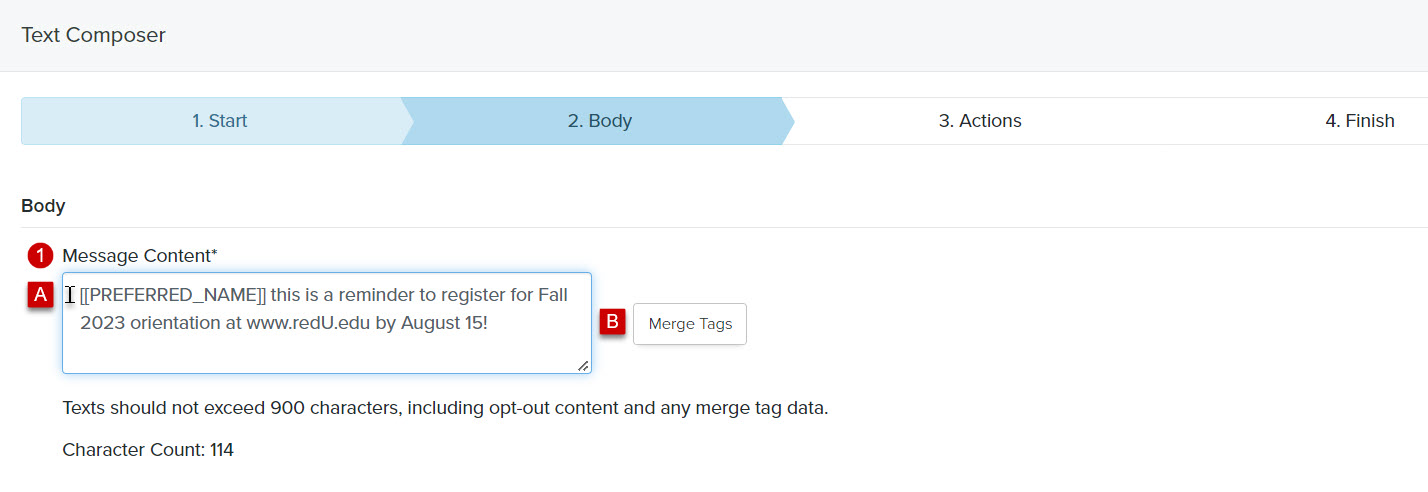
To personalize the text, you can insert Merge Tags.
-
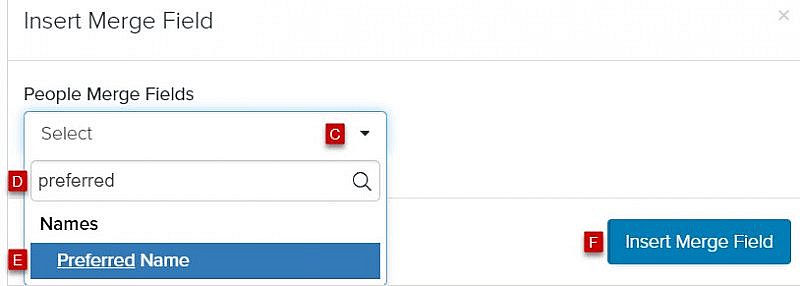
- Place your cursor where you want to insert a merge tag
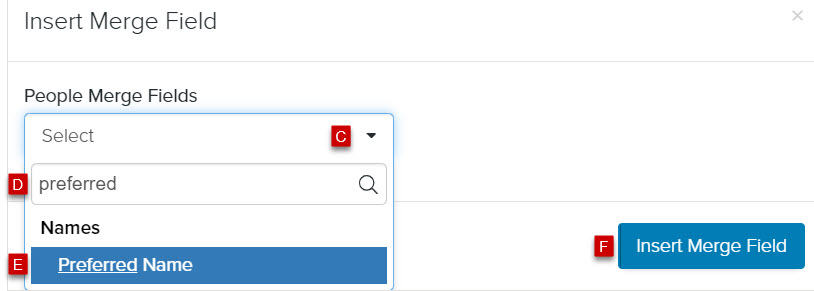
- Click Merge Tags. The Insert Merge Field window will display.
- Click on the People Merge Fields dropdown menu
- In the Search field, enter the name of the merge field you want to insert or scroll through the list of merge fields in the dropdown menu
- Click the field name that you want to insert
- Click Insert Merge Field. The Merge Field will display in the text
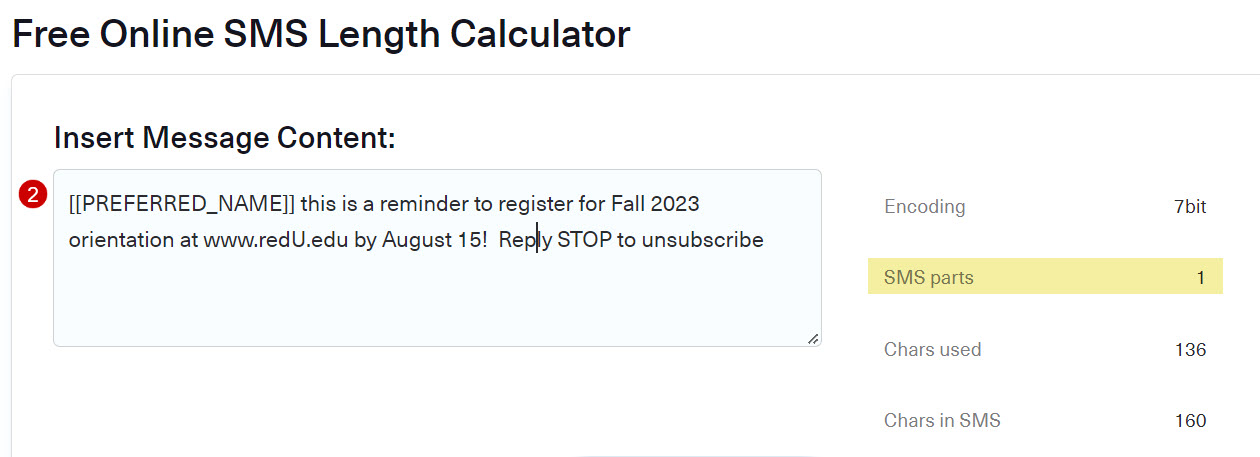
- Copy and paste the text message content into an SMS Length Calculator, such as Messente, to ensure that your text will be sent in one part
Tip: A text that’s 160 characters, or less, is considered one part. If your text exceeds 160 characters, your text will need to be broken into multiple parts to be sent and the total number of parts will then be deducted from your text message block balance. See Text FAQs for more information.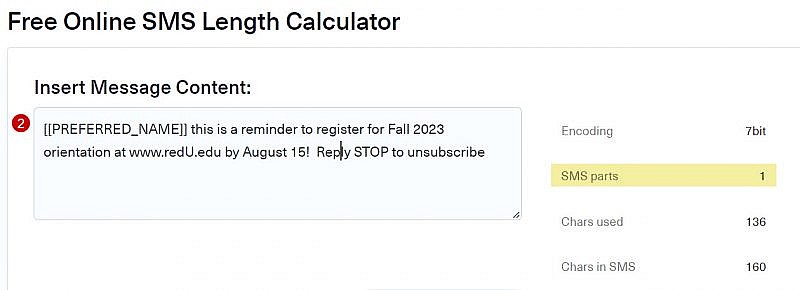
- Make any necessary adjustments
- Click Save Changes or Save & Continue. A banner will display notifying you that your text has been updated.
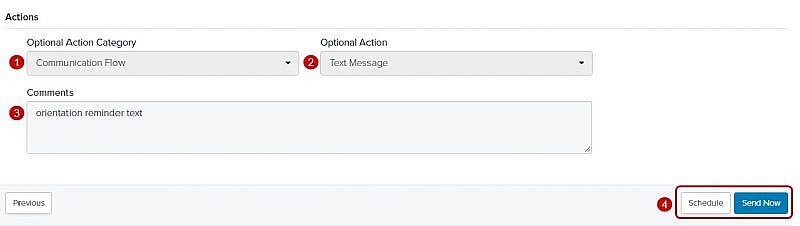
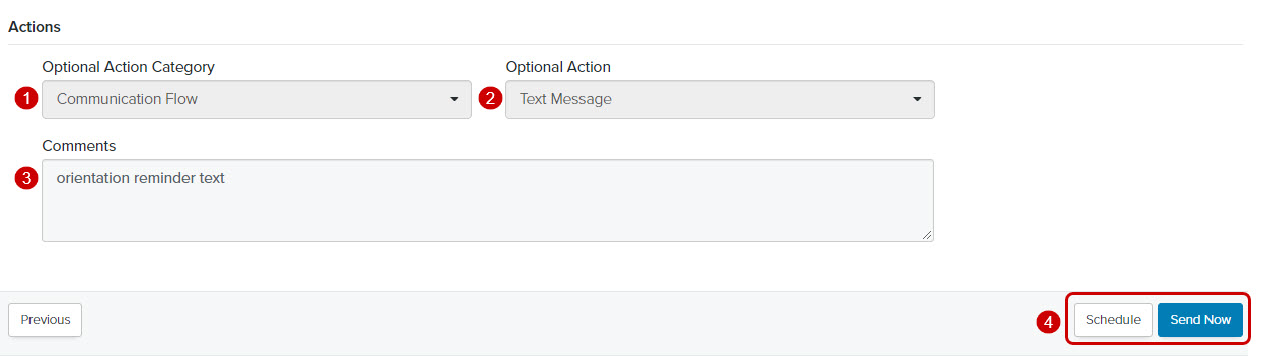
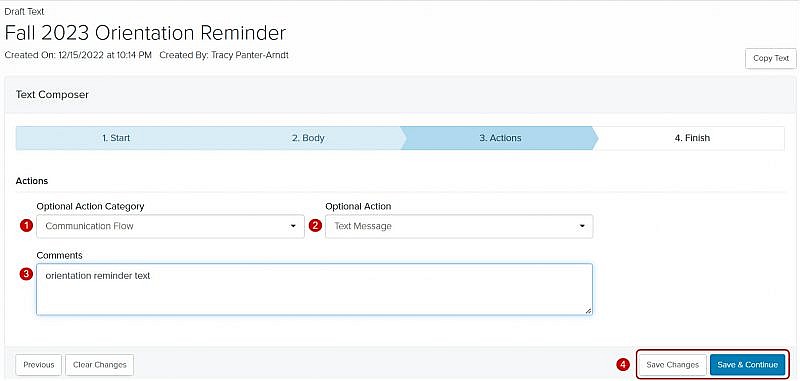
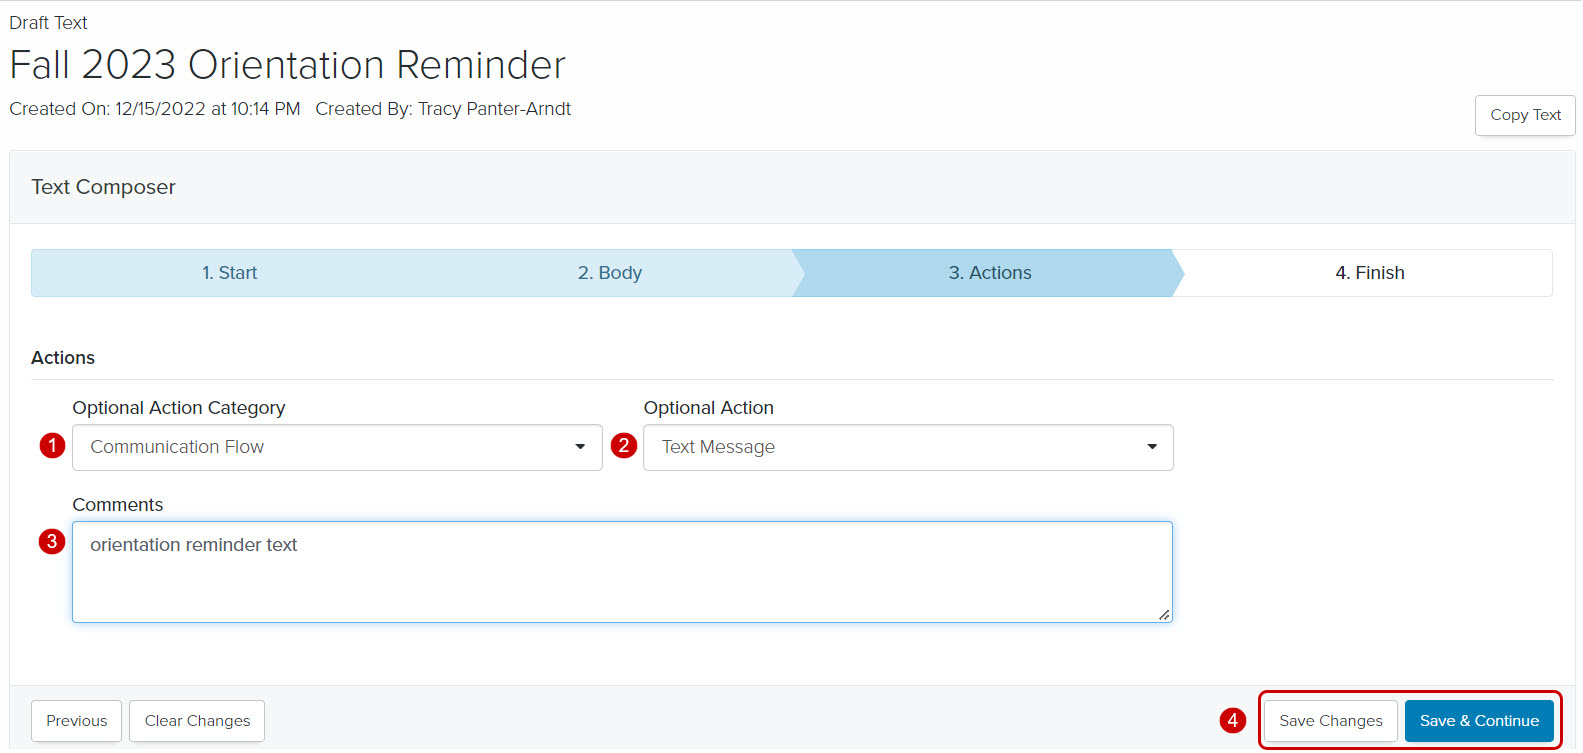
Actions
Prior to sending your text, you’ll need to determine what, if any, action you would like to attach to each text recipient’s record as a hidden action.
- Optional Action Category: Select a category (e.g., Campus Event, Communication Flow, Travel) from the Optional Action Category dropdown menu
- Optional Action: Select an action (e.g., Counselor Interview, Academic Interest, College Fair) from the Optional Action dropdown menu
- Comments: Enter additional information about the action, if appropriate
- Click Save Changes or Save & Continue. A banner will display confirming that your text has been updated.
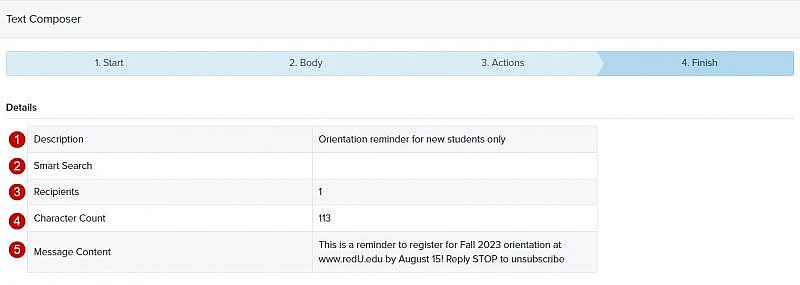
Finish
Before sending your text, review the information below and make any necessary updates.
Details
- Description: The description of the text
- Smart Search: The link to the Smart Search that was used to create the text recipient list
Tip: If a single phone number was selected, the Smart Search field will be empty if a single phone number was selected. - Number of Recipients: The number of recipients that will be sent the text. (e.g., If Fireworks displays 1 to 60 recipients, but the Detail Recipients only shows three, then your text will only be sent to 3 of 60 recipients)
Tip: To make any changes to the list of text recipients, scroll down to the list of text recipients and click the name of the text recipient. - Character Count: The total number of characters in the text message body
- Message Content: The text message body content

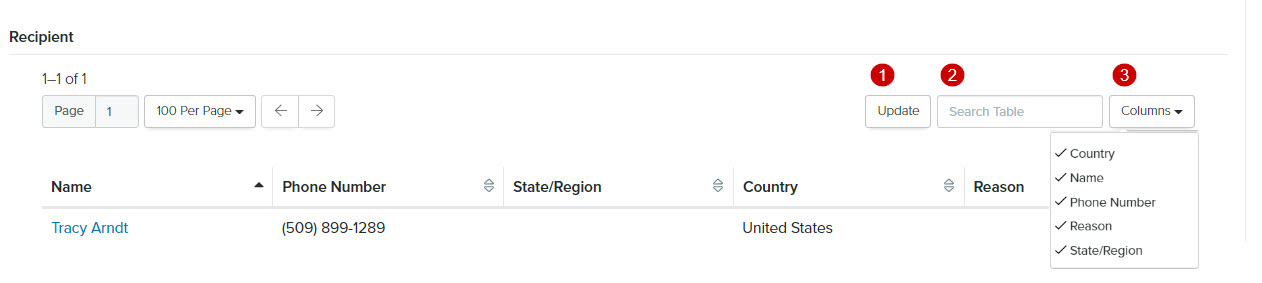
Recipients
- Update: If you’ve made any updates to the list of text recipient(s), click Update
Tip: Make sure to click Update whether you are using a Smart Search or sending the text to a single phone number. - Search: Enter the name of a text recipient to quickly find a specific record
- Columns: Select the columns that you want to display on the Recipients page
- Name: The name of the text recipient
- Phone Number: The mobile phone number of the text recipient
- State/Region: The state/region of the text recipient
- Country: The country of the text recipient
- Reason: The reason the text was not delivered
Tip: If the Reason field is empty, then the text will be sent to that phone number. If there is an error message, it will display why the phone number does not meet the conditions in Phone Number Conditions on the first page of this article.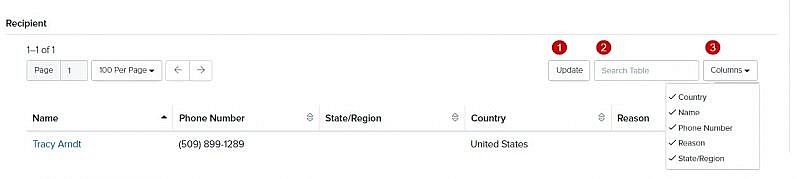
Actions
- Optional Action Category: The action category (e.g., Campus Event, Communication Flow, Travel) from the Optional Action Category dropdown menu
- Optional Action: The action (e.g., Counselor Interview, Academic Interest, College Fair) from the Optional Action dropdown menu
- Comments: Enter additional information about the action, if appropriate
Tip: The Optional Action Category field, Optional Action field, and Comments field, will not display on the Action tab. However, this information will be part of the text recipient’s record and can be used as a condition in Smart Searches. - Click Schedule or Send Now