Navigation: Records > Person
Using Quick Add
- From the bottom navigation bar, click

- Click Person. A Quick Add window will display.

- Enter the person record details
Tip: To create a person record, you’ll need to enter a first name, last name, and at least one point of contact.
- First Name*
- Last Name*
- Email Address*
- Email Type*
- Email Opt-In Method*
- Phone Number*
- Phone Type*
- Address 1*
- Address 2
- Address 3
- Address 4
- City*
- State/Province*
- ZIP/Postal Code*
- Country*

- Role*

Tip: The role you assign to a person will determine the fields that display in the person record.
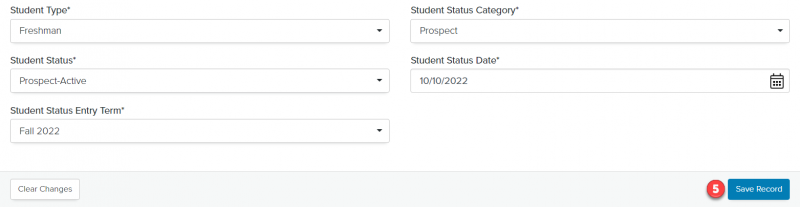
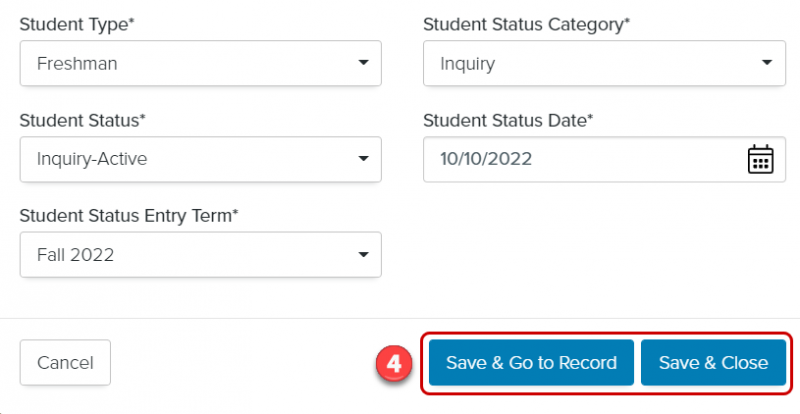
If you select Student, you’ll need to complete the additional fields below:
- Student Type*: The type (e.g., Freshman, Transfer, International) of student
- Student Status Category*: The student’s stage (e.g., Prospect, Inquiry, Applicant, Accepted, Deposited, Enrolled) in the enrollment funnel
- Student Status*: The student’s status (e.g., Inquiry Active, Applicant Incomplete, Applicant Complete) in the enrollment funnel
- Student Status Date*: The date the Student Status was added or updated
- Student Status Entry Term*: The term (e.g., Fall 2023, Spring 2024, Summer 2024) the student plans to enroll


- Click Save & Go to Record or Save & Close
Using the Records Menu
- From the bottom navigation bar, click Records
- Click Person. The Person Manager page will display.

- Click +Create. The People Composer will display.

- Enter the person record details
- First Name*
- Last Name*
- Email Address*
- Email Type*
- Email Opt-In Method*
- Phone Number*
- Phone Type*
- Address 1*
- Address 2
- Address 3
- Address 4
- City*
- State/Province*
- ZIP/Postal Code*
- Country*
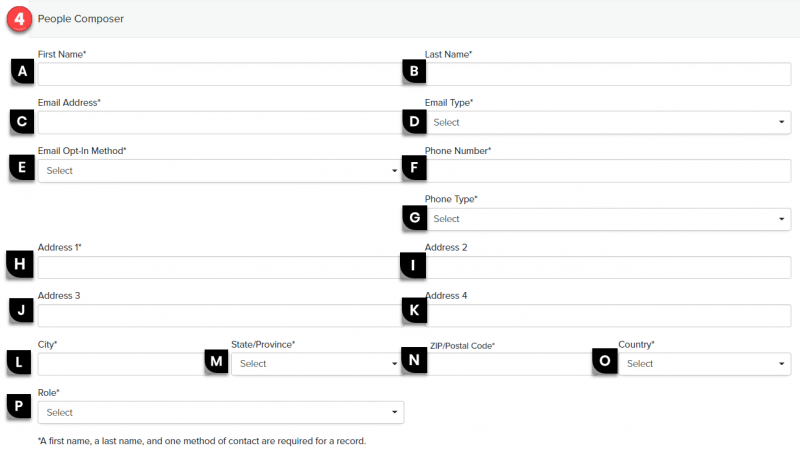
- Role*
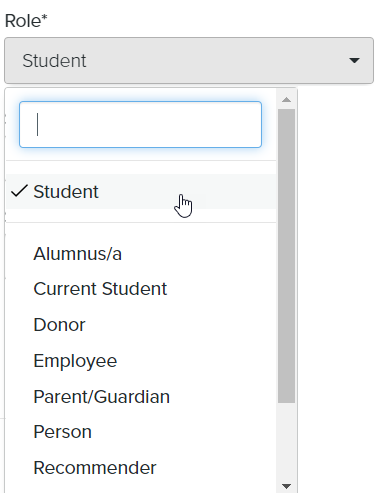
Tip: The role you assign to a person will determine the fields that display in the person record.
If you select Student, you’ll need to complete the additional fields below:
- Student Type*: The type (e.g., Freshman, Transfer, International) of student
- Student Status Category*: The student’s stage (e.g., Prospect, Inquiry, Applicant, Accepted, Deposited, Enrolled) in the enrollment funnel
- Student Status*: The student’s status (e.g., Inquiry Active, Applicant Incomplete, Applicant Complete) in the enrollment funnel
- Student Status Date*: The date the Student Status was added or updated
- Student Status Entry Term*: The term (e.g., Fall 2023, Spring 2024, Summer 2024) the student plans to enroll
- Click Save Record