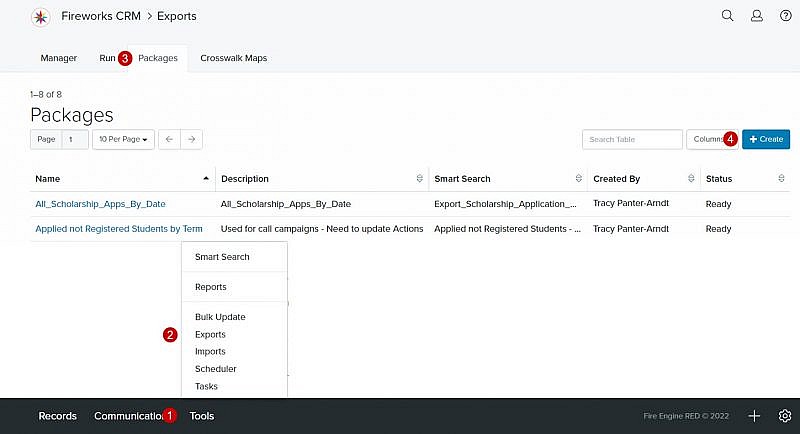
Navigation: Tools > Exports > Packages
Accessing the Export Package Composer
- From the bottom navigation bar, click Tools
- Click Exports. The Exports Manager will display.
- Click Packages. The Exports Packages Manager will display.
- Click +Create. The Export Package Composer will display.
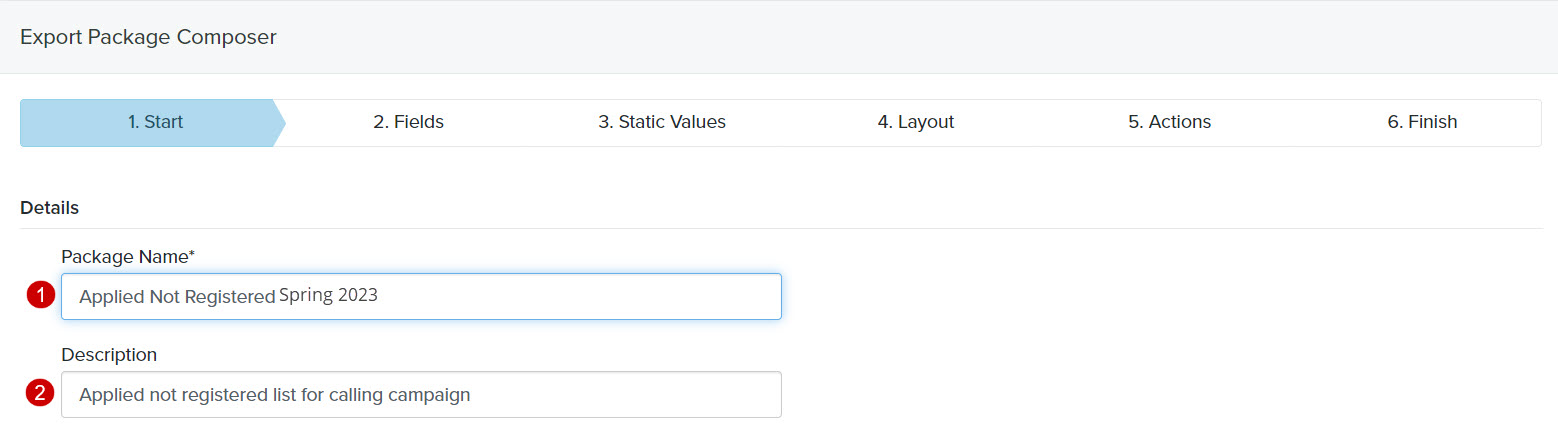
Using the Export Package Composer
The Export Package Composer has six sections that you’ll need to complete.
Tip: As you complete a section, you will automatically be moved to the next section.
-
- Start
- Fields
- Static Values
- Layout
- Actions
- Finish
Tip: Be sure to save your information frequently.
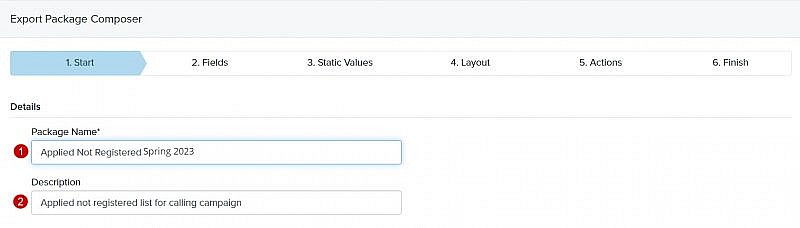
Start
Details
- Package Name: Enter the name of your export package
- Description: Describe the export package so that other staff members will be able to easily identify it
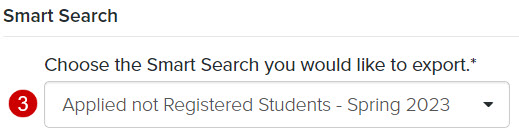
Smart Search
- Choose a Smart Search you would like to export: Select the Smart Search which identifies the records you would like to export
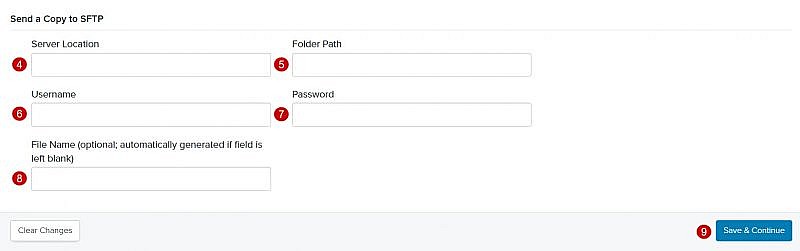
Send a Copy to SFTP
- Server Location: Enter sftp.fireworkscrm.com
- Folder Path: Enter the name of folder where you want the file to be sent
- Username: Enter your SFTP username
- Password: Enter your SFTP password
- File Name: Enter the file name
Tip: If you leave the File Name field blank, Fireworks will generate a file name for you. - Click Save & Continue
Fields
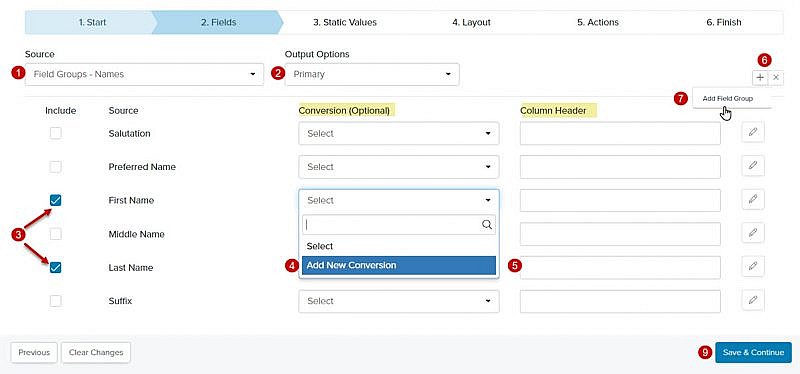
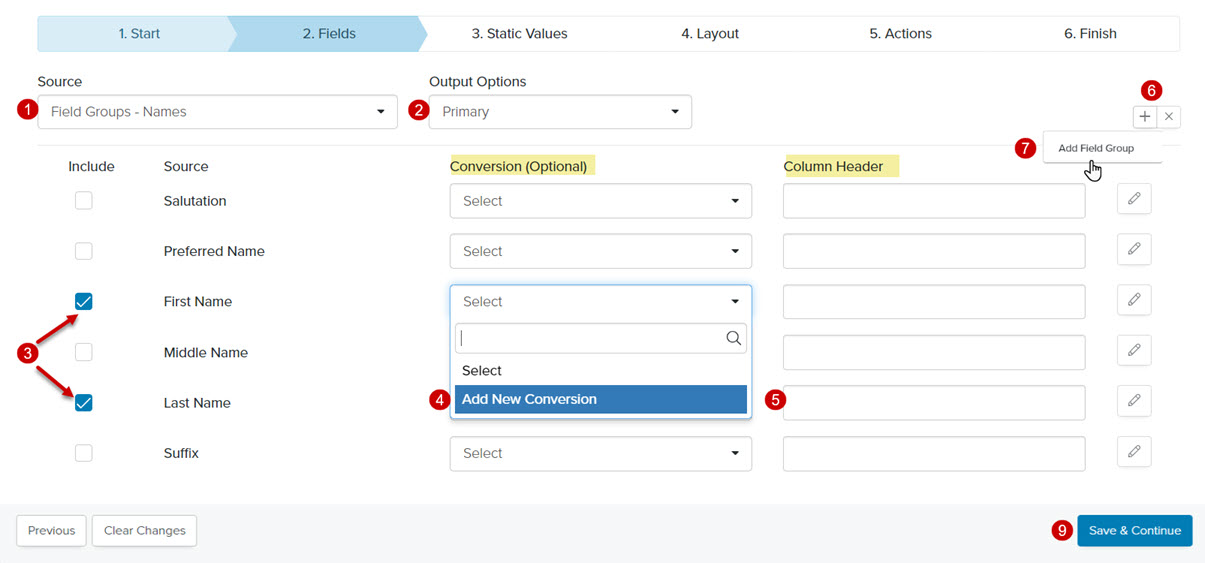
- Source: Select the source from the Source dropdown menu.
- Output Options: Select an output option from the Output Options dropdown menu, when applicable
Tip: The appropriate output options will display for the field group you selected. - Check the box to the left of each Source field you want to include in your export
- Click the Conversion (Optional) dropdown menu and select Add New Conversion or one of your previously saved conversions, if available
- Column Header: Enter a column header
Tip: If you leave the column headers blank, they will default to the Fireworks field names in the export file. - Click

- Select Add Field Group to add another field group
- Repeat steps 1-7 (directly above) until all of the fields have been added
- Click Save & Continue
Static Values
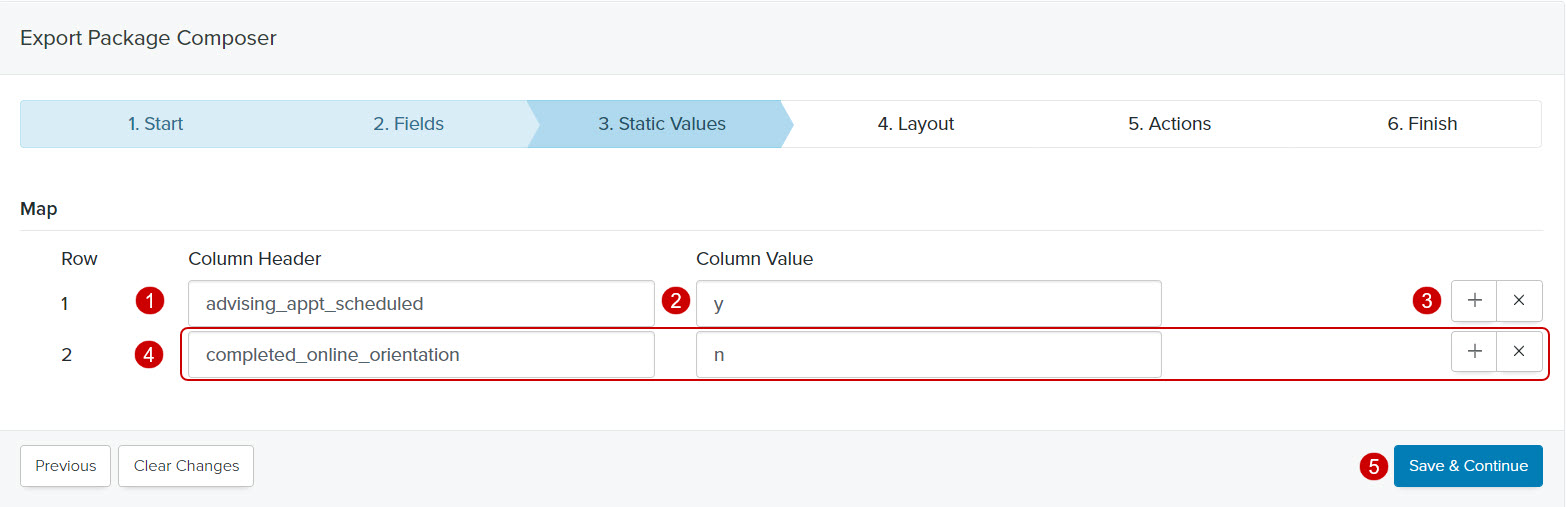
- Column Header: Enter a column header
- Column Value: Enter a column value
- Click
- Repeat steps 1-3 (directly above) until all of the static values are added
- Click Save & Continue

Layout
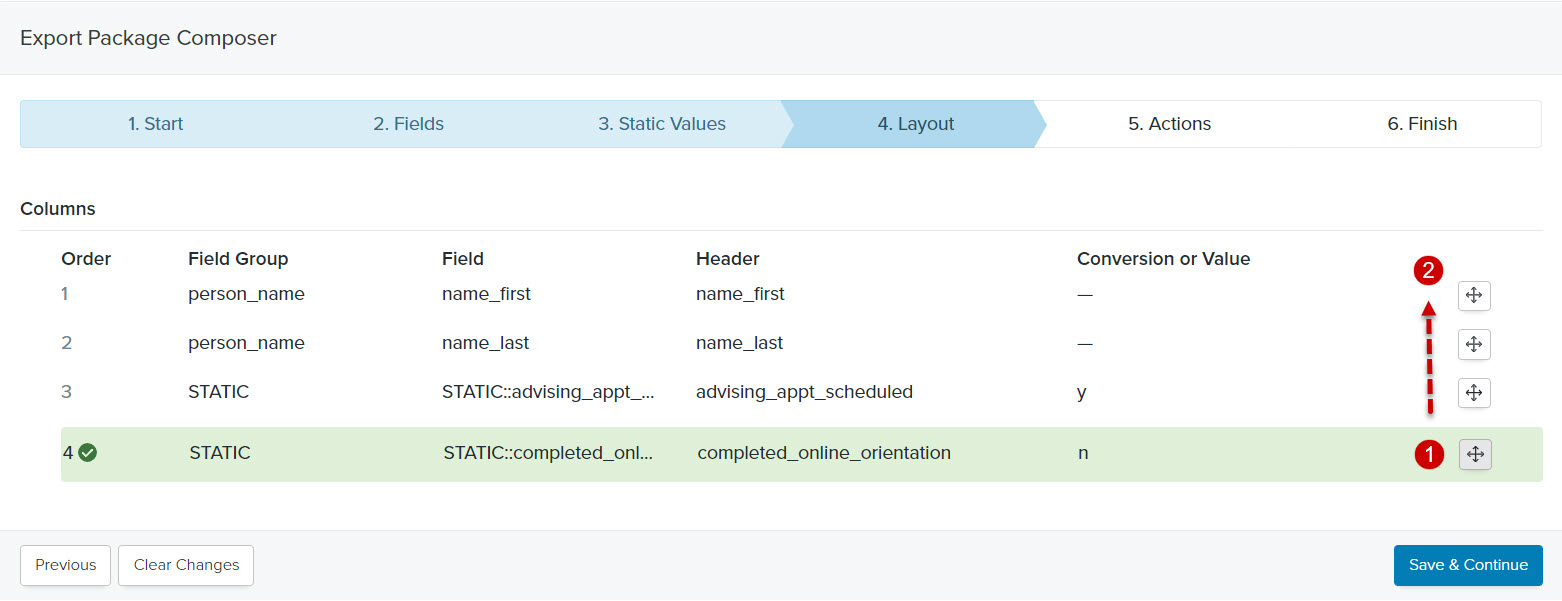
- To reorder a column(s), click
 to the right of the column you want to reorder
 - Drag the column to the location you desire
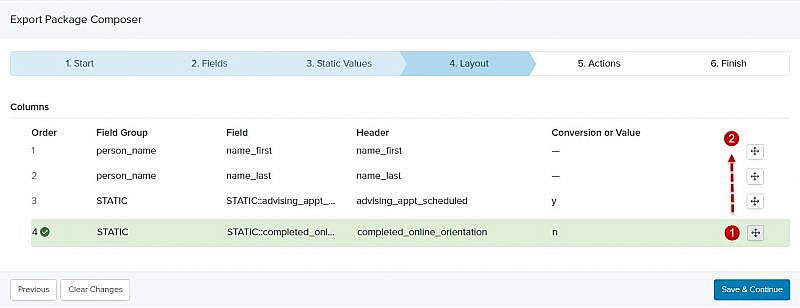
- Once you’ve finished reordering your columns, click Save & Continue
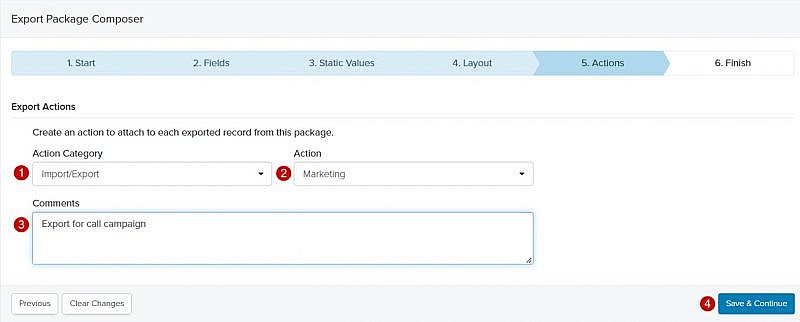
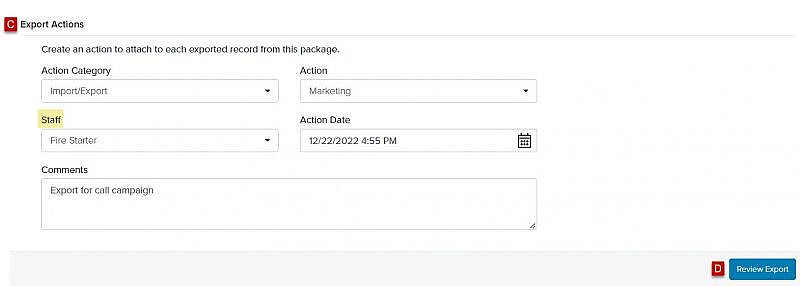
Actions
Prior to running your export package, you’ll need to determine what additional action (if any) you’d like to post to each exported record.
- Category: Select a category from the Category dropdown menu (e.g., Data Management)
- Action: Select an action from the Action dropdown menu (e.g., Record sent to SIS)
- Comments: Enter additional information about the action
- Click Save & Continue

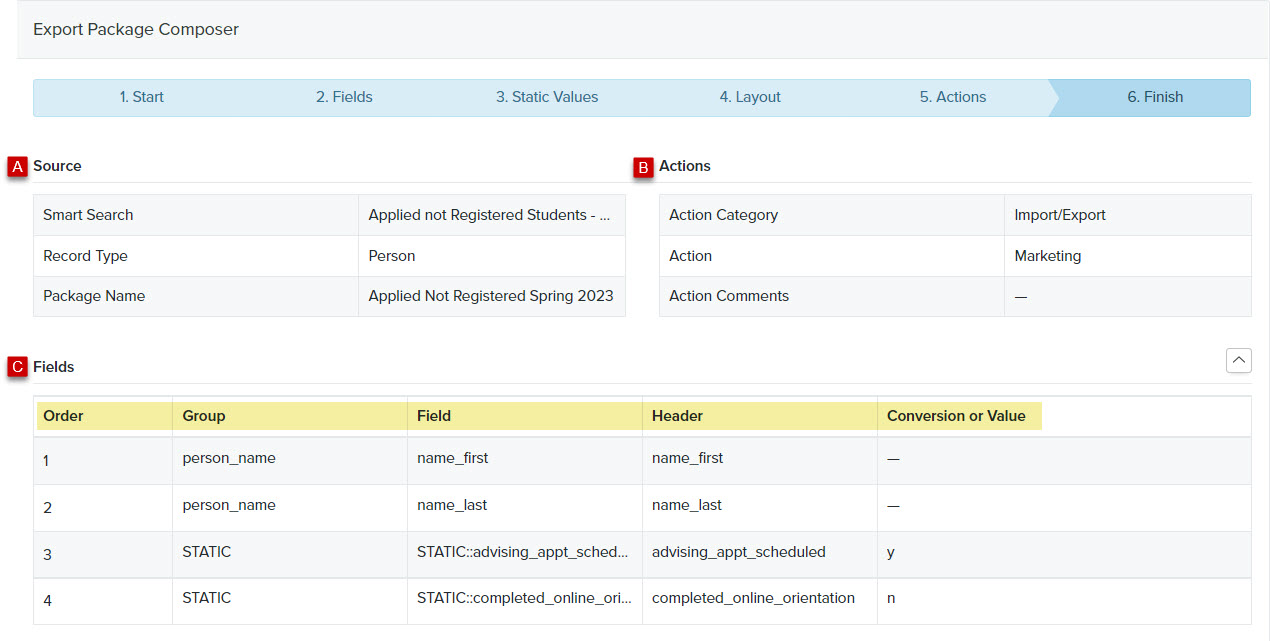
Finish
- Review each area of the Finish page
-
- Source
- Actions
- Fields (i.e., order, field, header, conversion)

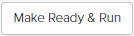
- You have two options:
-
- Make Ready and Run
- Make Ready and Run
-
-
- Click
 . The Run Export page will display.
 - Review your selections (i.e., Package, Smart Search, SFTP setting)
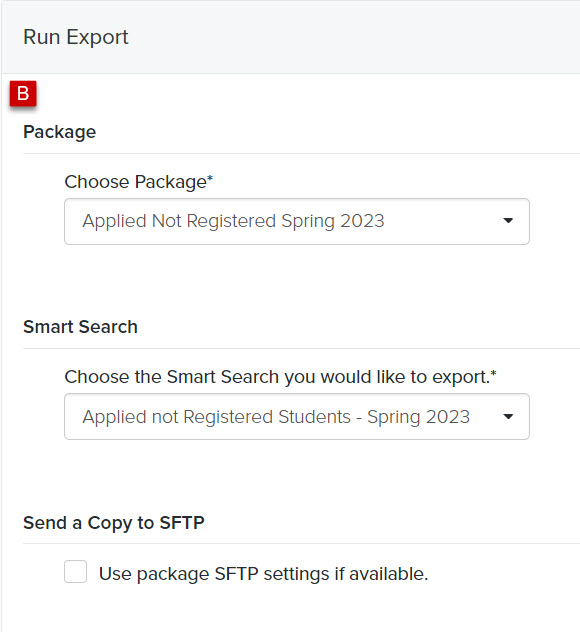
- Review your Export Actions and select the Staff member you want to associate with the action that is posted to each exported record
- Click Review Export. The Run Export: Review page will display.
- Click Run Export or Schedule Export
- Click
-

-
-
Make Ready
-
-
-
- Click
 and the status of your export package will update from Draft to Ready
- Click
-