Navigation: Tools > Imports > Packages
Accessing the Import Package Composer
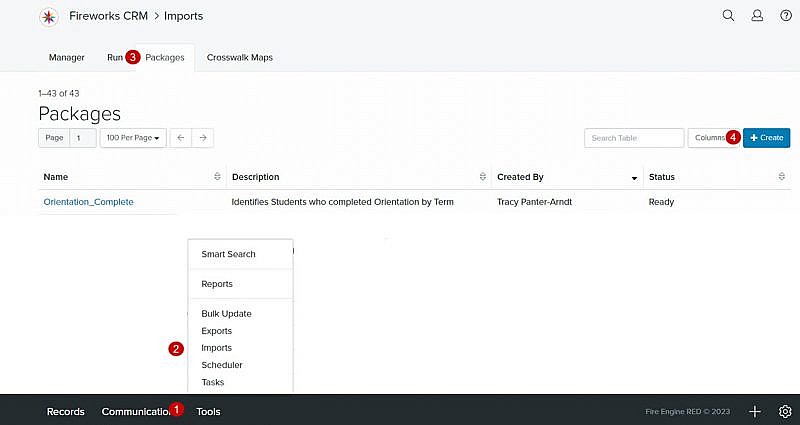
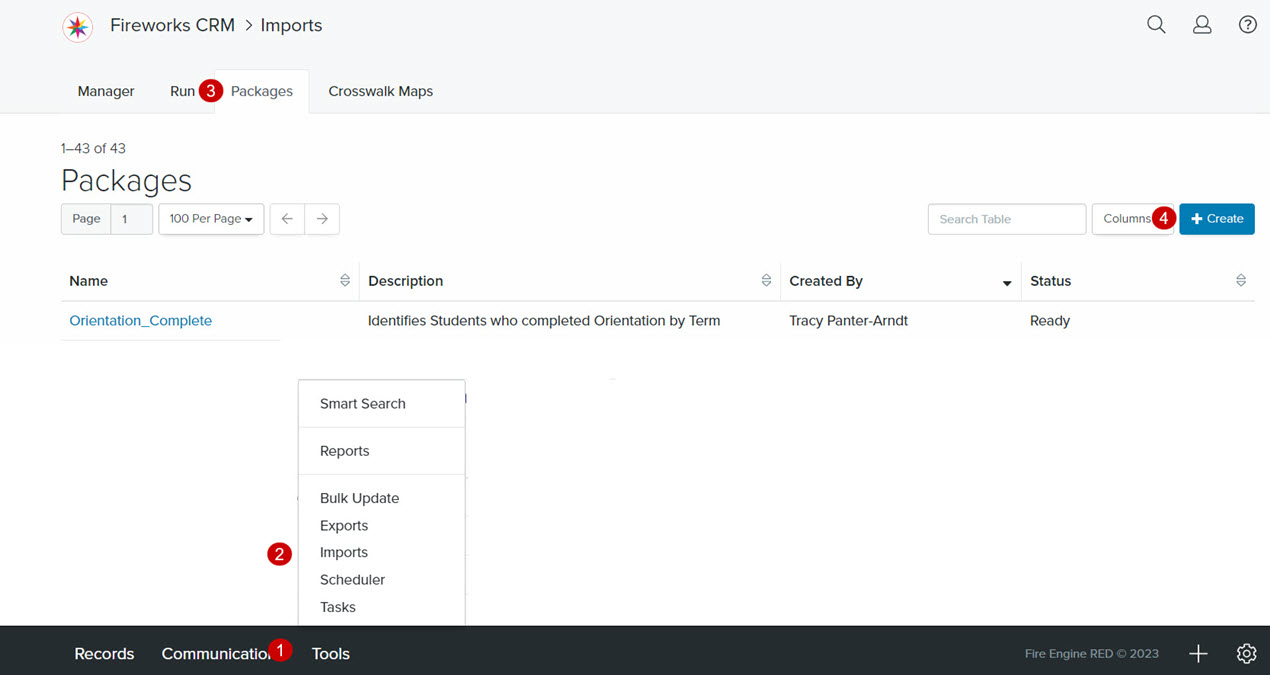
- From the bottom navigation bar, click Tools
- Click Imports. The Import Manager will display.
- Click Packages. The Import Package Manager will display.
- Click +Create. The Import Package Composer will display.
Using the Import Package Composer
The Import Package Composer has five sections that you’ll need to complete.
Tip: As you complete a section, you will automatically be moved to the next section.
- Start
- Required Fields
- Optional Fields
- Actions
- Finish
Tip: Be sure to save your information frequently.
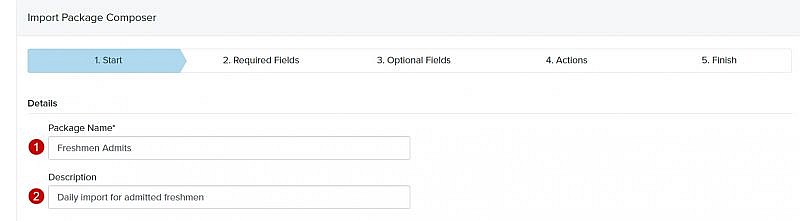
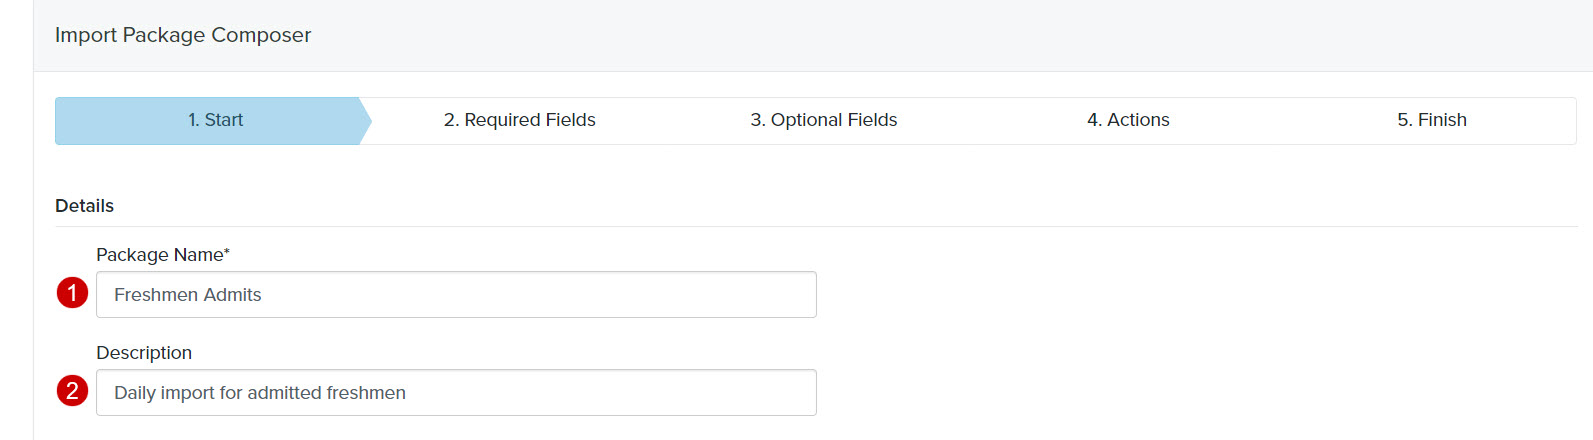
Start
Details
- Package Name: Enter the name of your import package
- Description: Describe the import package so that other staff members will be able to easily identify it
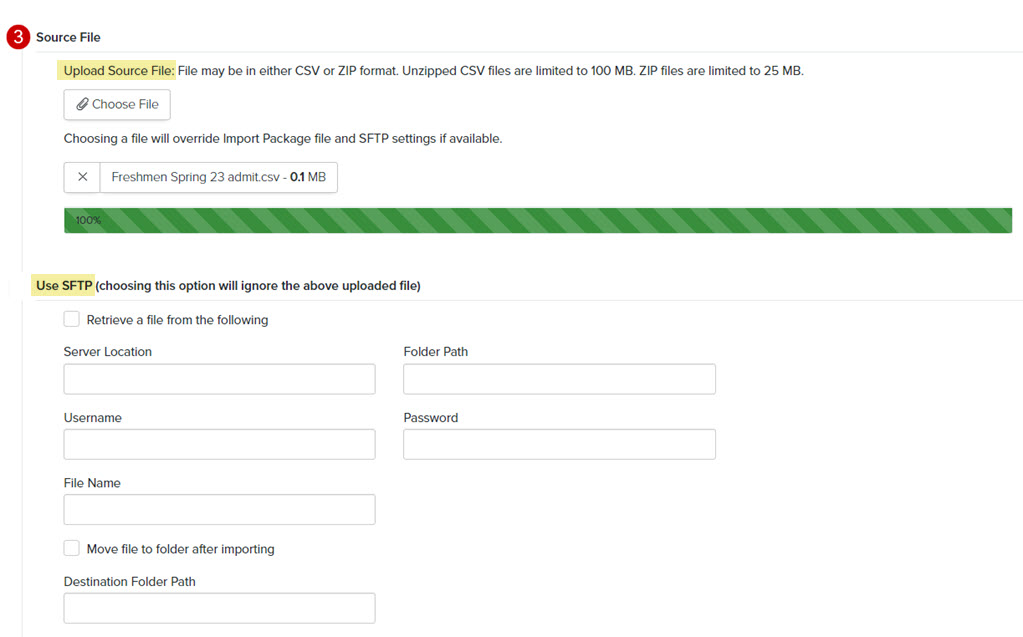
- Source File: There are two ways to upload your file into Fireworks
- Choose File from computer manually
- Use the SFTP to retrieve the file from the server
Tip: Accepted file formats: CSV (limited to 100 MB) or ZIP (limited to 25 MB)
-
-
Choose File
-
-
-
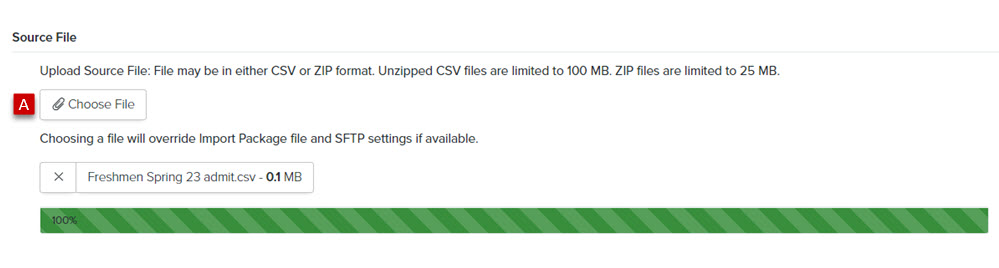
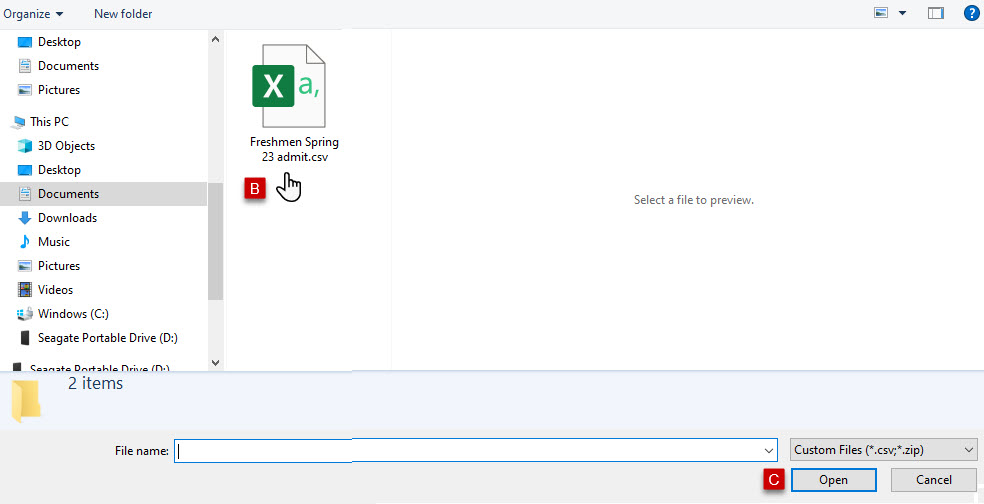
- Click Choose File
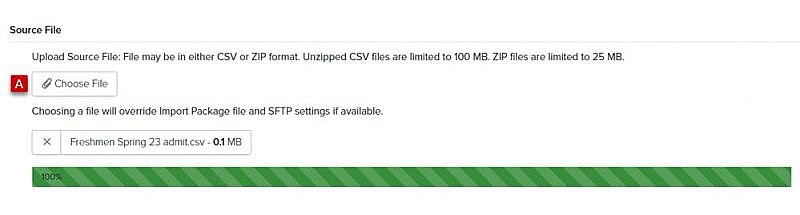
- Select the the file from your computer
- Click Open
Tip: You’ll see a progress bar while your source file is uploading. Once your source file has been uploaded, the name of the file and file size will be displayed.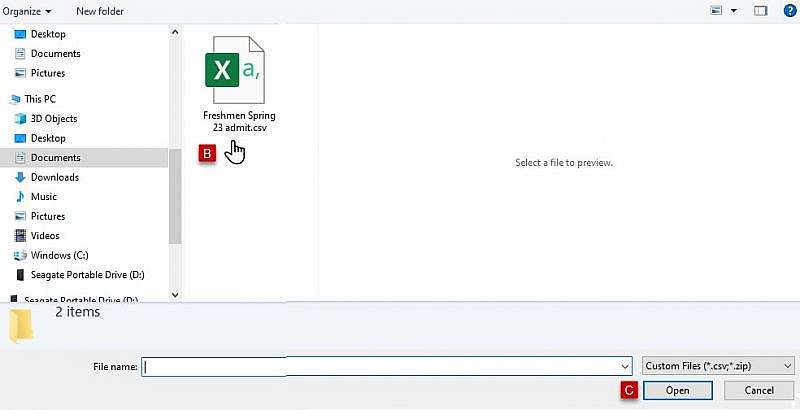
- Click Choose File
-
-
-
Use SFTP
-
-
-
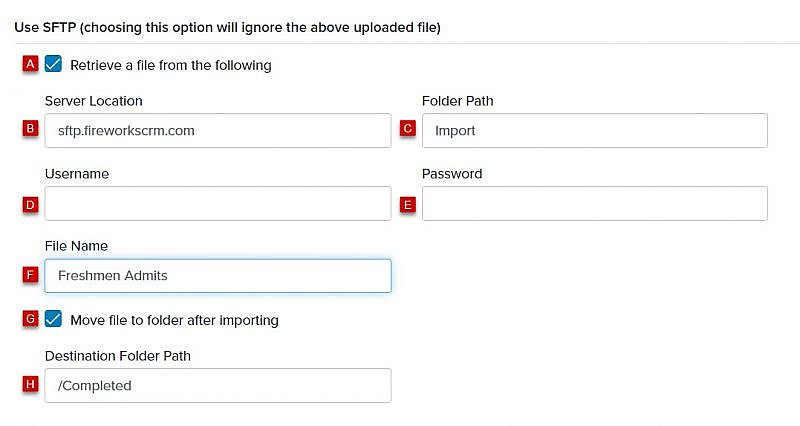
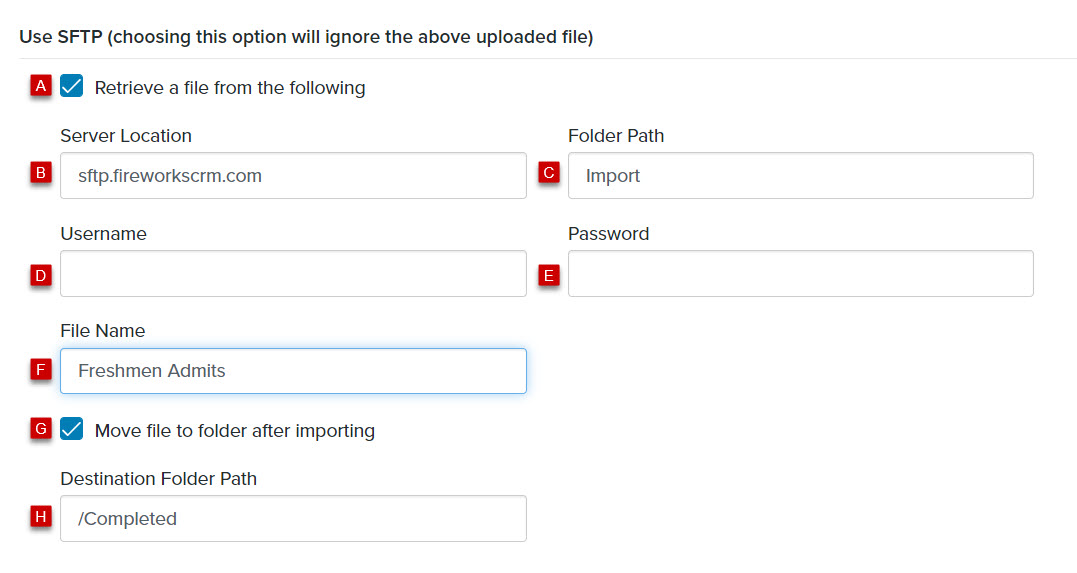
- Check the Retrieve a file from the following box
Tip: Choosing SFTP will ignore a file selected in Choose File above. - Server Location: Enter the server location URL
- Folder Path: Enter the folder path
- Username: Enter your SFTP username
- Password: Enter your SFTP password
- File Name: Enter the file name
- Move file to folder after importing: Check the box to have your file automatically moved to the appropriate folder after importing it
Tip: We strongly recommend that you use Move file to folder after importing. This will ensure that you will not override a file you’ve previously uploaded with the same name. - Destination Folder Path: Enter the destination folder path where you want to move your file
- Check the Retrieve a file from the following box
-
Record Type
- Choose the record type being imported: Select the record type y(i.e., Student, Person, or Organization) you want to import
Tip: The default for Record Type is Student. - Click Save & Continue


Required Fields
Tip: The instructions below assume you’ve chosen Student as your record type.
Tip: You only need to map a value from your source file, if it is a required field indicated by an asterisk (*) in the Fields column. You do not need to map a value for all of the fields in your source file.
Source
You have two Source options from the Source dropdown menu:
- Select a Source Column (Header)
Tip: The source column headers default to the headers that are in the source file you selected on the Start tab. - Select No Source (Static Value)
Source Column
- Click on the appropriate source file column header in the Source dropdown menu
- Click the Conversion (Optional) dropdown menu
- Select Add New Conversion or one of your previously saved conversions, if available
Tip: Conversions are only needed if you want to convert (change) the data from your source file (i.e., Your source file has the first name in all capital letters. You can use Conversion to convert the first name so that only the first letter of the first name is capitalized).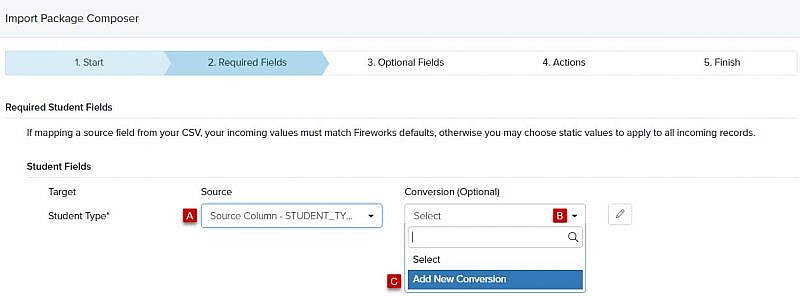

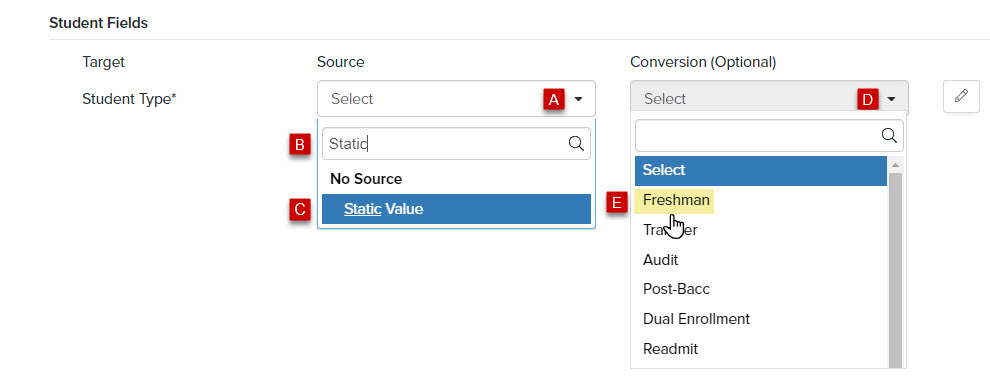
No Source (Static Value)
- If you do not have a matching header field in your source file, click the Source dropdown menu
- Enter Static Value in the search field or scroll to the bottom of the list under No Source C. Click Static Value
- Click the Conversion (Optional) dropdown menu and it will display the available values for the field
- Select the appropriate value

- Repeat the instructions under Source for all required fields
- Click

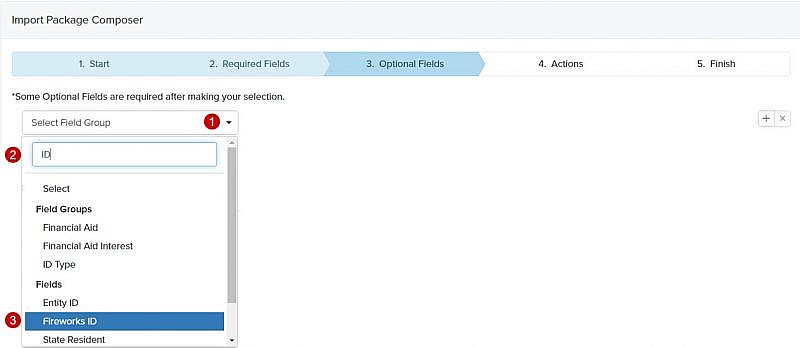
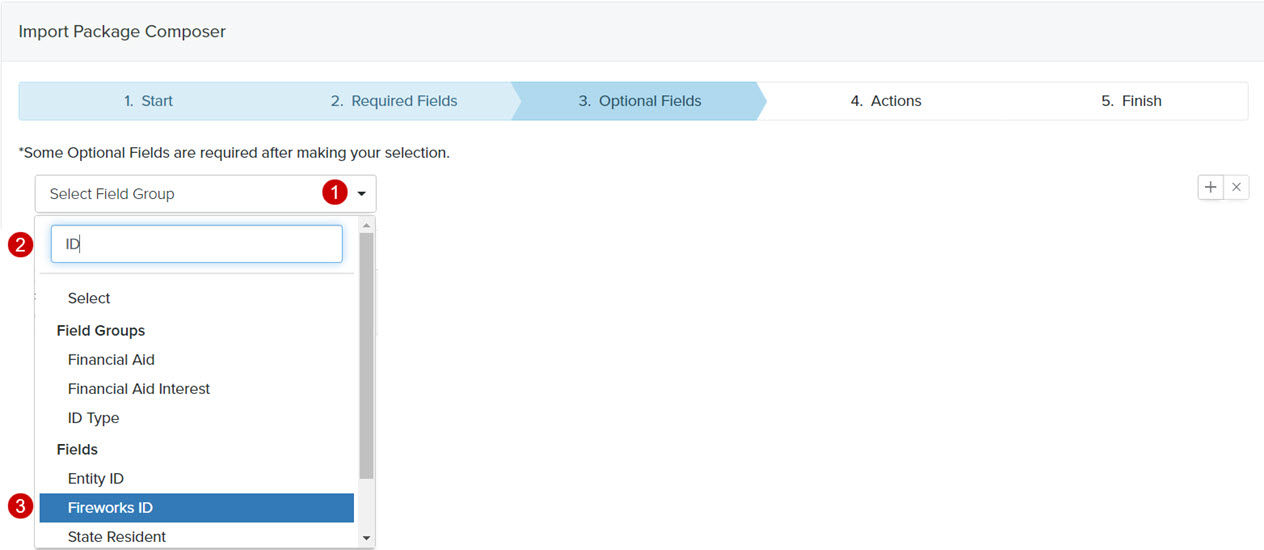
Optional Fields
- Click the Select Field Group dropdown menu
- Enter a Field name in the search table or scroll through the list to locate the Optional Field name you want to add to the import.
- Click the Field name. The appropriate required fields for that group will display.
- You have two options from the Source dropdown menu:
-
- Source Column
- No Source
Source Column (Header)
- Click on the appropriate source file header in the Source dropdown menu
- Click the Conversion (Optional) dropdown menu
- Select Add New Conversion or one of your previously saved conversions, if available
Tip: Conversions are only needed if you want to convert (change) the data from your source file (i.e., Your source file has the first name in all capital letters. You can use Conversions to lowercase all of the letters except for the first letter of the first name).

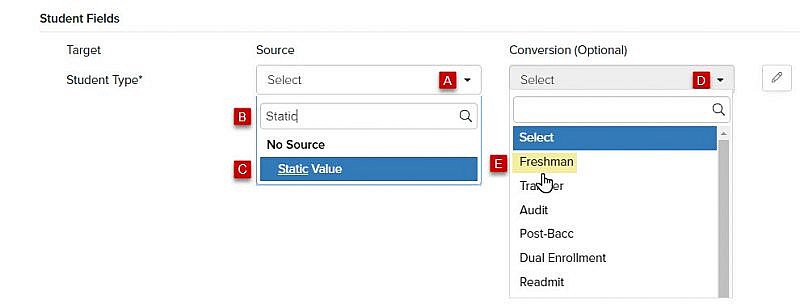
No Source (Static Value)
- If you do not have a matching header field in your source file, click the Source dropdown menu
Tip: If all of the records in your source file are freshman, and you do not have a column header in your source file for Student Type with a value of freshman, you’ll be able to assign a static value. - Enter Static Value in the search field or scroll to the bottom of the list under No Source
- Click Static Value
- Click the Conversion (Optional) dropdown menu and it will display the available values for the field
- Select the appropriate value
- Click
 to add additional Optional Fields to the import
 - Repeat the instructions under Optional Fields for all fields that you want to import
- Click

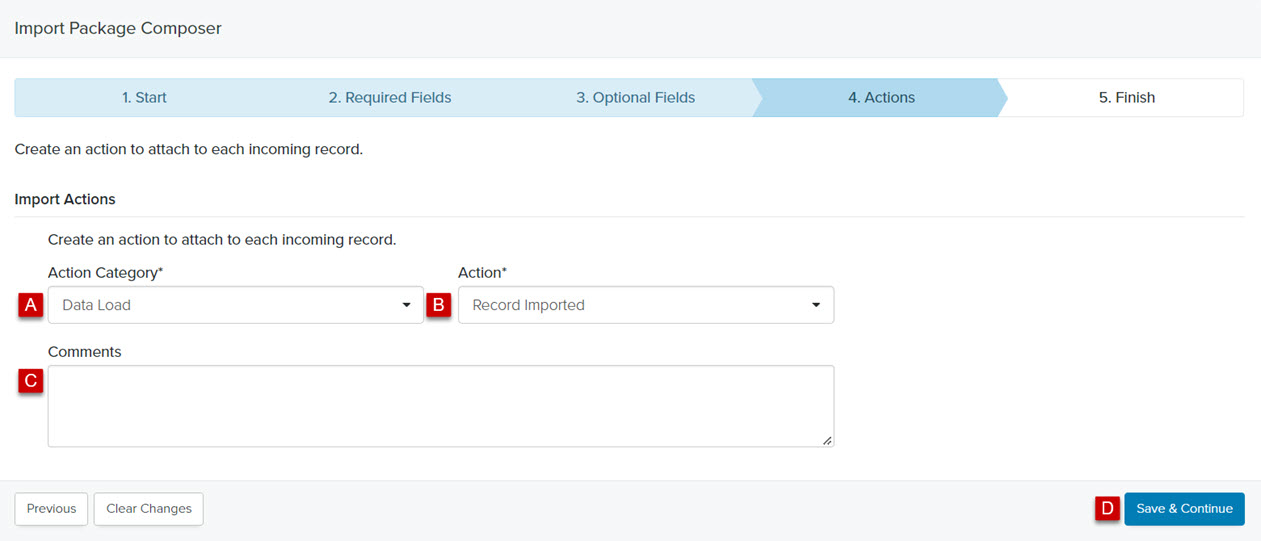
Actions
Prior to running your import package, you’ll need to determine what additional action (if any) you would like to post to each imported record.
- Category: Select a category (e.g., Campus Event, Travel ) from the Category dropdown menu
- Action: Select an action (e.g., High School Visit, Inquiry Card, College Fair) from the Action dropdown menu
- Comments: Enter additional information about the action, if appropriate
- Click

Finish
- Before finishing your import package, review the information on the Finish tab:
-
- Source
- Actions
- Required Field Map
- Optional Field Map
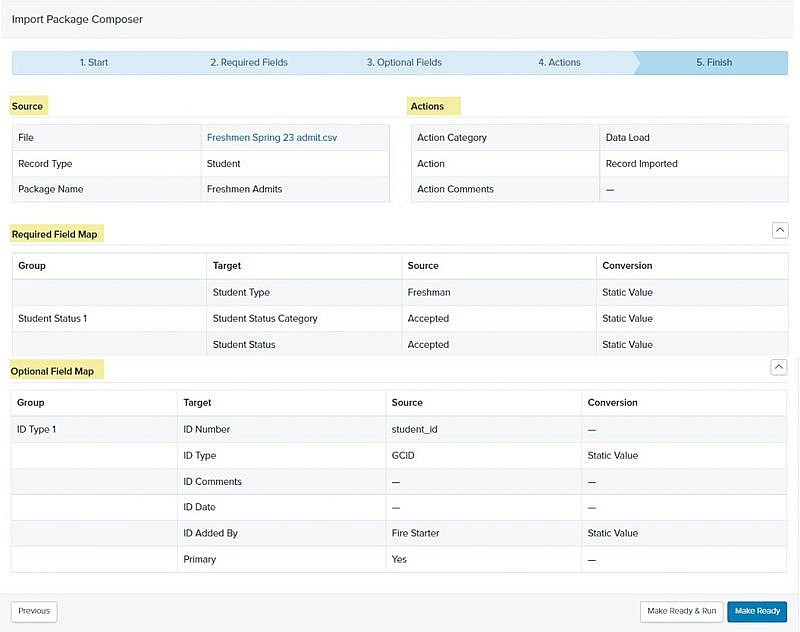
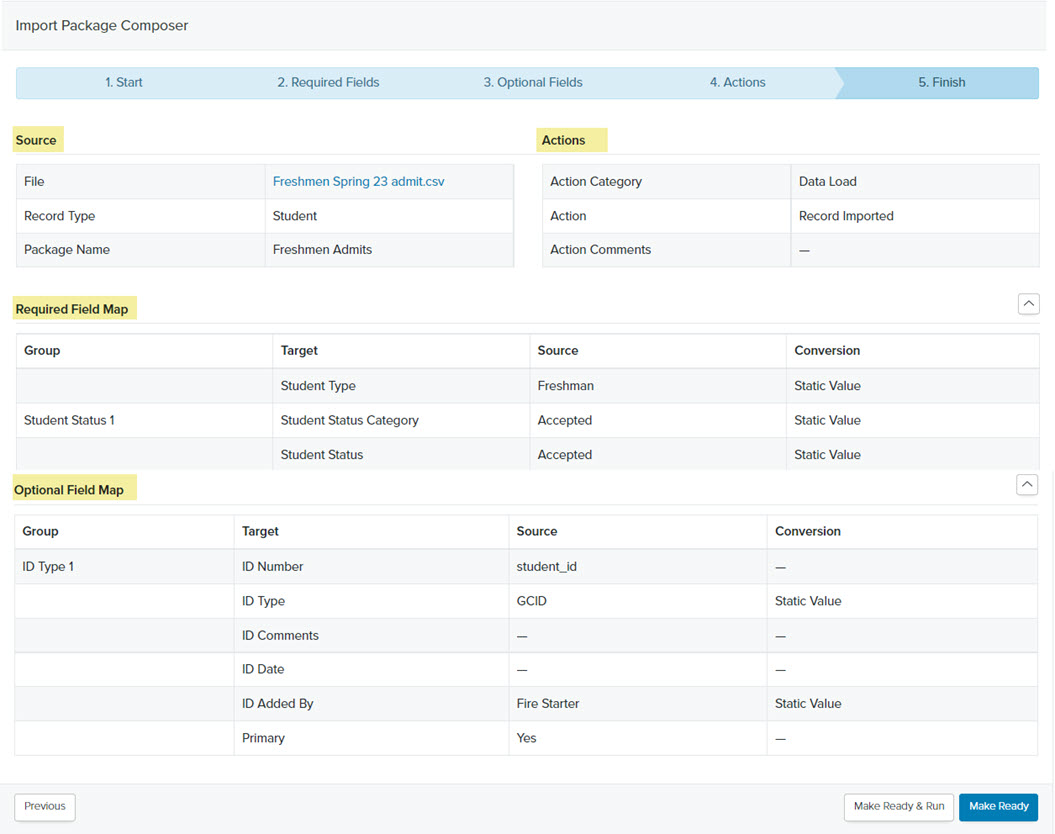
- You have two options:
- Make Ready & Run
Tip: Prepares the import package to be reviewed, run or scheduled immediately. - Make Ready
Tip: Prepares the import package to be reviewed, run or scheduled at a later time.
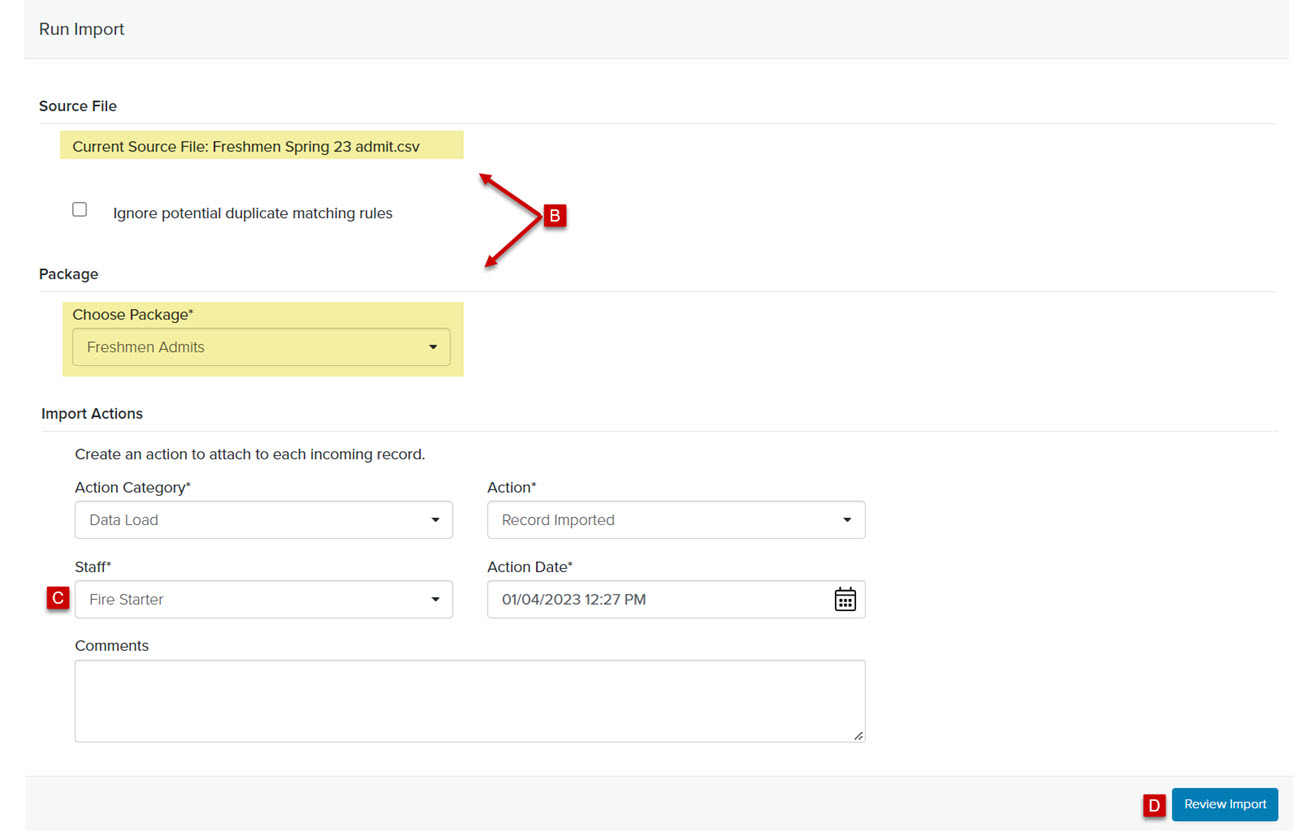
- Make Ready & Run
Make Ready & Run
- Click Make Ready & Run. The Run Import page will display

- Review your selections (i.e., source file and package)
- Select the Staff member you want to associate with the action that is posted to each imported record
- Click Review Import. The Run Import: Review page will display

- Click Run Import or Schedule Import
Tip: Your import package will take a few moments to run. When it’s finished, you can review it on the Import Manager page.

Make Ready
- Click Make Ready and the status of your import package will update from Draft to Ready
