Navigation: Communications > Letters > Templates
Tip: Fireworks enables you to create and run letters, postcards, invitations, mailing labels, and other types of print materials. To keep things simple, we refer to all types of print materials as letters (except labels).
Accessing the Letter Template Composer
- From the bottom navigation bar, click Communications
- Click Letters. The Letter Manager will display.
- Click Templates. The Letter Templates page will display.
- Click +Create. The Letter Composer will display.


Using the Letter Composer
The Letter Composer has six areas that you’ll need to complete.
- Load Template
- Details
- Options
- Content
- Labels
- User Action
Load Template
- Load Template: Click the Load Template dropdown menu
Tip: If you want to create a letter from scratch, leave the Load Template field empty and start with the Template Name field. - In the Search field, enter the name of the letter template you want to use or scroll through the list of letter templates on the page
- Click the name of the letter template. The recipients, content, and format will automatically populate the appropriate fields.


Details
- Template Name: Enter the name of the letter template
- Description: Describe your template so that other staff members will be able to easily identify it

Options
- Click Select from the Record Type dropdown menu
- Choose Person or Organization.

Content
Tip: If you’ve selected a template when you started your letter, the format and body will be pre-populated. If not, it will be empty.
- Include Letter: The Include Letter box is checked by default.
Tip: If you’re only creating labels, uncheck the box to the left of the Include Letter box. - Format: Click the Format dropdown menu and select a layout design

- Body: Enter the letter content in the body
There are two ways to create the content of your letter:
-
- Use the What You See Is What You Get (WYSIWYG) editor
- Copy and paste the HTML code into the Source Code window


Inserting an Image
From a URL
- Click Insert
- Click Insert Image from URL. The Insert/edit image window will display.

- Source: Enter the URL of the image
- Image description: Describe the image so that other staff members can easily identify it
Tip: The description will be used as the image Alt Tag. - Dimensions: Adjust the dimensions of the image, if appropriate
Tip: We recommend that you keep the Constrain Proportions box checked to maintain the integrity of the image. - Click Ok

From the Media Library
Tip: To insert an image from the Media Library, you will first need to upload the image to the Media Library.
- Click Insert
- Click Insert Image from Media Library. The Insert Media window will display.

- In the Search field, enter the name of the image you want to insert or scroll through the list of images on the page
- Check the Select Media box to the left of the image name
- Click Insert Image. The image will display in the HTML window.

Tip: Once the image has been inserted into the layout, you can easily resize it by clicking the image and dragging the corners in and out.


Inserting Merge Fields
To personalize your letter, you can insert a variety of merge fields into the body of the letter.
- Place your cursor where you want the merge field to display in your letter
- Click Insert
- Click Insert Merge Fields. The Insert Merge Field window will display.

- Click the People Merge Fields dropdown menu. A list of available merge fields will display.
- In the Search field, enter the name of the merge field you want to insert or scroll through the list of merge fields in the dropdown menu
- Select the merge field you want to insert
- Click Insert Merge Field. The merge field will be inserted into the body of the letter.


Tip: Instead of inserting individual merge fields for the address (i.e., address1, address2, city, state, zip/postal code), you can enter [[Address Full Person::PRIMARY]], and Fireworks will automatically insert the person’s full address, including address2.
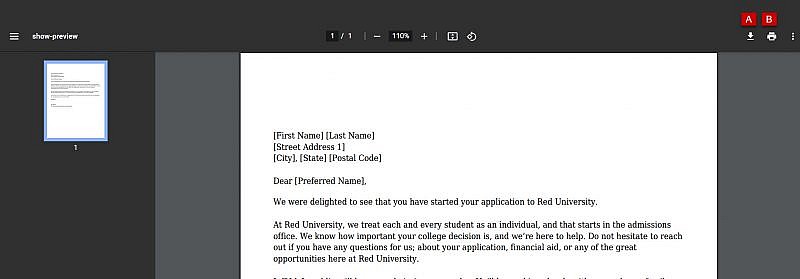
Previewing your letter
- Click View
- Click Preview. The Show-preview window will display your letter.

- You have two options:
- Click Download to save your letter as a PDF
- Click Print to print your letter

Labels
- Include Labels: The Include Labels box will automatically be checked when you create a letter
Tip: If you do not want to generate labels, uncheck the box to the left of Include Labels. - Format: Select a layout for the letter from the Format dropdown menu

- Content: Insert the appropriate merge fields into the content window
- Click Insert
- Click Insert Merge Fields

- Select Address 1
Tip: Instead of inserting individual merge fields for the address (i.e., address1, address2, city, state, zip/postal code), you can enter [[Address Full Person::PRIMARY]], and Fireworks will automatically insert the person’s full address, including address2. - Click Insert Merge Field

- Repeat steps A – D (directly above) and insert the merge fields below to complete the address:
- First Name
- Last Name
- Address 2 (if applicable)
- City
- State/Province
Tip: After you insert the State/Province merge field, enter ::ABBREVIATION after the word STATE. The final result will be [[ADDRESS_STATE::ABBREVIATION]]. This will create a two-letter state value (i.e., VT) instead of a full state name (i.e., Vermont). - Postal Code


Custom Merge Fields
There are a few special merge fields that you may need to use when creating content for letters. A few are listed below.
| Merge Field Value | Merge Field Command |
|---|---|
| Banner ID Field Opposed to Primary | [[ID_NUMBER::FILTERVAL:BANNER_STUDENT_ID]] |
| Primary Application Component Displays | [[Application Component::PRIMARY]] |
| Resume Component Displays | [[Application Component::FILTERVAL:resume]] |
| Most Recent Application Component Displays | [[Application Component::RECENT:3]] |
| Full Person Address (i.e., of insert individual address fields) | [[Address Full Person::PRIMARY]] |
| State Abbreviation (2 letter abbreviation) | [[ADDRESS_STATE::ABBREVIATION]] |
User Action
Prior to sending your letter, you will need to determine what, if any, action (if any) you would like to post to each letter recipient’s record.
- Category: Select a category (e.g., Communication Flow ) from the Category dropdown menu
- Action: Select an action (e.g., Letter) from the Action dropdown menu
- Staff: Select a staff member from the Staff dropdown menu
- Date: Select a date and time by clicking

- Comments: Enter additional information about the action, if appropriate


Save Letter
- Click
 . A banner will display confirming that your letter template has been created.